Is your 2005 Honda CRV key fob starting to act up? Maybe you have to press the buttons harder, or perhaps it’s completely stopped working. Before you rush to the dealership and spend unnecessary money, you should know that replacing the battery in your key fob is a straightforward task you can easily handle yourself. This guide will walk you through each step, ensuring you can quickly and efficiently replace your 2005 Honda CRV key fob battery and get back on the road with a fully functional remote.
Replacing the battery in your key fob is not only a simple DIY task but also a cost-effective solution. Dealerships often charge a significant amount for this minor service, but with a little know-how and the right battery, you can save yourself both time and money. Let’s dive into how to replace the battery in your 2005 Honda CRV key fob.
What You’ll Need
Before you begin, gather these simple tools:
- A new CR1616 3V Lithium Battery: This is the specific battery type required for your 2005 Honda CRV key fob. You can find these at most drug stores, online retailers, and battery specialty shops. It’s a good idea to have one on hand before you start to avoid any delays.
- A small Phillips head screwdriver (mini or micro size): This will be used to remove the tiny screw holding the key fob together. Ensure it’s the right size to prevent stripping the screw head.
- A soft cloth or towel: This will protect your key fob from scratches during the process and can also help with gripping small components.
Step-by-Step Guide to Replacing Your Key Fob Battery
Now, let’s get to the battery replacement process. Follow these steps carefully:
-
Locate the Screw: Turn your 2005 Honda CRV key fob over, and you’ll find a small Phillips head screw on the back casing. This is usually the only screw holding the fob together.
-
Remove the Screw: Using your mini Phillips head screwdriver, carefully unscrew and remove this screw. Place the screw in a safe place so you don’t lose it. It’s quite small!
-
Open the Key Fob Casing: Once the screw is removed, you should be able to split the key fob casing. Gently pry the two halves apart. You might be able to do this with your fingers, or you can use a small, flat, non-metallic tool to help separate them if they are tightly sealed.
-
Access the Inner Cassette: After opening the outer casing, you’ll see an inner plastic cassette containing the electronic components and the battery. This cassette is usually black or dark grey.
-
Open the Inner Cassette: The inner cassette itself is also made of two halves. Carefully pry open this cassette. There might be small clips holding it together. Gently separate the two halves to reveal the battery.
-
Identify the Battery: You will now see the CR1616 battery nestled inside the cassette. Take note of the battery’s orientation – specifically, the positive (+) side. Usually, the writing and the positive symbol will be facing downwards, against the plastic.
-
Remove the Old Battery: Gently pry out the old CR1616 battery. You can use your fingertip or the edge of a soft cloth to avoid touching the battery contacts directly with your fingers.
-
Install the New Battery: Take your new CR1616 battery and place it into the battery slot. Ensure the positive (+) side is facing in the same direction as the old battery was removed (usually writing side down, so you can’t see the writing when correctly installed). Press it firmly but gently into place to ensure good contact. Using a cloth to press the battery in can help keep the contact surfaces clean.
-
Reassemble the Inner Cassette: Carefully snap the two halves of the inner cassette back together. Ensure they are securely closed.
-
Reassemble the Key Fob Casing: Place the inner cassette back into one half of the outer key fob casing. Then, align and snap the two halves of the outer casing back together.
-
Replace the Screw: Finally, put the small Phillips head screw back into its place and tighten it gently but firmly. Do not overtighten, as this could damage the plastic casing.
-
Test Your Key Fob: Test all the buttons on your key fob to ensure they are working correctly. Your 2005 Honda CRV key fob should now be functioning with its new battery!
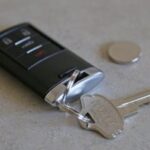
An opened 2005 Honda CRV key fob revealing the internal components and battery compartment, illustrating the simple access for battery replacement.
Tips and Considerations
- Screw Tightness: As mentioned in the original post, the screw can sometimes be tight initially. Apply firm, steady pressure while turning the screwdriver to avoid stripping the screw head. If it’s very stubborn, a small pair of pliers or vice-grips can help get a better grip on the screwdriver for initial loosening, but be careful not to damage the screwdriver or key fob.
- Static Electricity: While not usually a major concern for key fobs, try to ground yourself by touching a metal object before handling the electronic components, especially in dry environments, to minimize any risk of static discharge.
- Battery Shelf Life: Key fob batteries, even unused ones, have a shelf life. If you have a spare key fob that you rarely use, its battery might still need replacement eventually due to natural discharge over time.
- Dealer Cost: As noted, dealerships often charge around $15 or more just to replace this battery. Doing it yourself saves you money and gives you the satisfaction of a quick and easy DIY fix.
- Online Battery Purchase: If you prefer to buy batteries online, you can often find CR1616 batteries at competitive prices on websites like Amazon or battery-specific retailers.
Conclusion
Replacing the battery in your 2005 Honda CRV key fob is an incredibly easy and rewarding task. By following these simple steps, you can avoid unnecessary dealership costs and ensure your key fob is always ready to unlock your car when you need it. Keep a spare CR1616 battery handy, and you’ll be prepared for the next time your key fob battery needs a change!