Is your 2006 BMW 3 Series key fob acting up, especially when the temperature drops? Many owners of the E90 3 Series experience issues with their key fobs in cold weather, noticing symptoms like the car failing to lock or unlock remotely, or losing personalized settings like radio presets after starting the engine. This is often a sign that the key fob battery is nearing the end of its life and struggling in colder conditions. Fortunately, replacing the battery in your BMW 3 Series key fob is a straightforward DIY task that can save you a trip to the dealership and the associated costs. This guide will walk you through the process of replacing your 2006 BMW 3 Series key fob battery, ensuring you can restore full functionality to your key and get back to enjoying your car’s features.
What You’ll Need for the Key Fob Battery Replacement
Before you begin, gather the necessary tools and the correct replacement battery. Using the right tools will make the process smoother and prevent damage to your key fob.
- Replacement Battery: You will need a VL2020 lithium-ion rechargeable battery. It’s crucial to get the correct type to ensure compatibility and proper function. You can find these batteries online from various retailers. Here’s an example of a compatible battery on eBay to ensure you are getting the right one. Pay close attention to the battery terminal orientation when purchasing.
- Sharp X-Acto Knife or Precision Knife: This is needed to carefully open the glued key fob casing. A sharp blade is essential for a clean cut and to avoid damaging the internal components.
- Non-metallic Pry Tool: A credit card, plastic pry tool, or guitar pick will work. Avoid using metal tools as they can damage the circuit board. This tool is used to gently lift the battery during desoldering.
- Soldering Iron and Solder: You’ll need a soldering iron to desolder the old battery and solder in the new one. Ensure you have solder suitable for electronics work.
- Desoldering Wick or Pump (Optional but Recommended): These tools can help remove excess solder, making it easier to remove the old battery and ensure a clean connection for the new one.
- Safety Glasses: Protect your eyes from solder fumes and debris.
Step-by-Step 2006 BMW 3 Series Key Fob Battery Replacement Guide
Now that you have everything you need, let’s proceed with replacing the battery in your 2006 BMW 3 Series key fob. Work in a well-lit area and take your time to avoid mistakes.
Step 1: Carefully Open the Key Fob Casing
The BMW key fob is sealed with glue, so you’ll need to carefully cut along the seam to open it.
- Inspect the Key Fob: Examine the key fob to identify the seam where the two halves of the casing are joined.
- Begin Cutting: Using your sharp X-Acto knife, gently start cutting along the seam. Apply steady, even pressure and avoid cutting too deep to prevent damage to the circuit board (PCB) inside. Multiple shallow passes are better than trying to force it open in one go.
- Work Around the Perimeter: Carefully work your way around the entire perimeter of the key fob, cutting through the glue. Take your time and be patient.
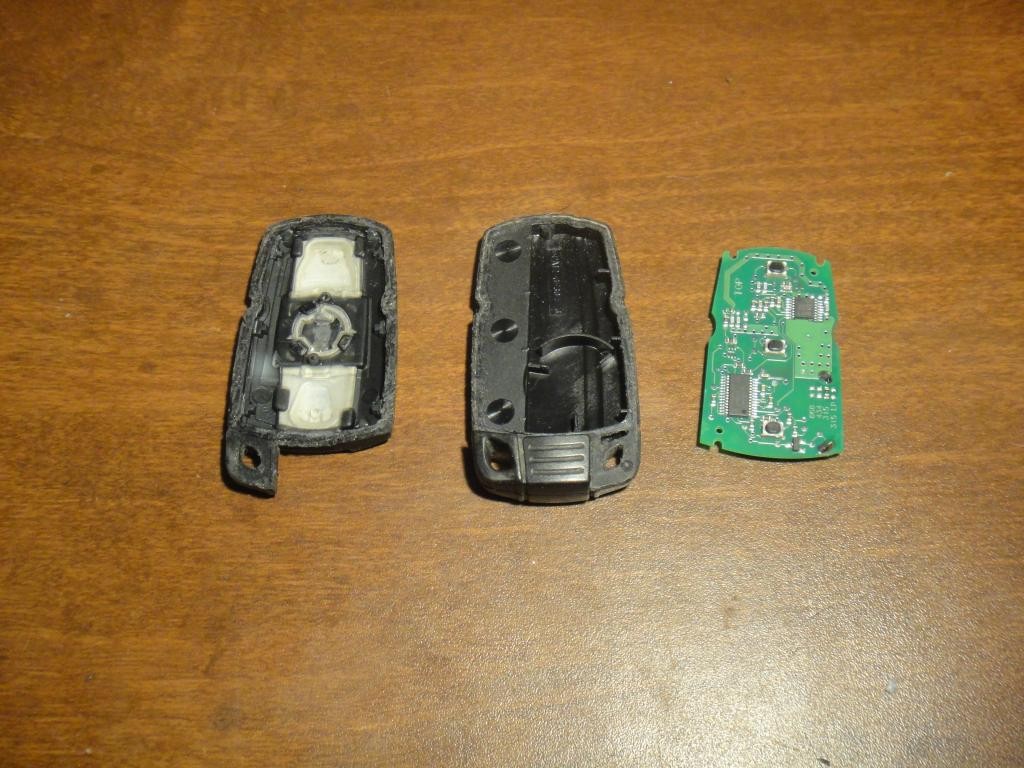
Step 2: Desoldering the Old Battery
Once the key fob is open, you’ll see the circuit board with the battery soldered in place.
- Identify Battery Terminals: Locate the terminals of the battery soldered to the PCB. Note their positions for installing the new battery correctly.
- Apply Tension: Slide your non-metallic pry tool (credit card or plastic pry tool) under the corner of the battery to apply gentle upward tension. This will help to lift the terminal slightly when you apply heat.
- Desolder the Corner Terminal: Apply heat from your soldering iron to the corner terminal of the battery. Once the solder melts, gently lift that corner of the battery using your pry tool.
- Desolder the Middle Terminal: Repeat the process for the middle terminal. Since the middle terminal often has a longer lead, desoldering the corner terminal first makes it easier to access and desolder the middle one.
- Remove the Old Battery: Once both terminals are desoldered, the old battery should be free. Carefully remove it from the PCB.
Step 3: Soldering the New Battery
Now it’s time to install the new VL2020 battery.
- Position the New Battery: Place the new battery into the battery holes on the PCB, ensuring the terminals are aligned correctly with the solder pads. Double-check the polarity and terminal orientation matches the original battery.
- Secure the Battery: Hold the PCB by its edges and gently press down on the new battery to ensure it is seated properly in the holes.
- Solder the Middle Terminal: Apply heat to the middle terminal solder pad on the PCB. Feed solder into the joint until you have a secure connection. The battery terminal should push through the existing solder and create a solid joint.
- Solder the Corner Terminal: Repeat the soldering process for the corner terminal, ensuring a good solder joint.
Step 4: Test and Reassemble the Key Fob
Before permanently sealing the key fob, test to ensure the new battery is working.
- Dry Fit and Test: Place the PCB back into the key fob housing without gluing it shut.
- Test Key Fob Functions: Test all key fob functions – locking, unlocking, and remote start (if applicable). Also, start your 2006 BMW 3 Series and check if your personalized settings are now saved.
- Troubleshooting (If Necessary): If the key fob doesn’t work, re-check your solder connections, battery orientation, and ensure you used the correct VL2020 battery. If it still doesn’t work, professional assistance might be needed.
Step 5: Reassemble and Seal the Key Fob
Once you’ve confirmed the key fob is working correctly, you can reassemble and seal it.
- Choose a Sealing Method: You have two options:
- New Housing: Purchase a new key fob housing for a fresh look.
- Glue Original Housing: If you choose to reuse the original housing, carefully apply a small amount of gel-type cyanoacrylate glue (super glue) to the seam. Gel type is recommended as it’s less likely to run and get onto the PCB.
- Glue the Housing: Apply glue sparingly to the edges of the key fob casing and carefully press the two halves together. Hold firmly until the glue sets. Avoid getting glue on the buttons or internal components.
Conclusion
Congratulations! You’ve successfully replaced the key fob battery in your 2006 BMW 3 Series. This DIY repair can save you money and restore the convenience of your key fob, especially resolving issues related to cold weather performance and lost settings. By following these steps and taking your time, you can confidently maintain your BMW and enjoy its features for years to come.