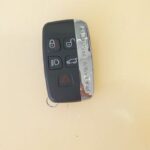
Lost or need to replace your 2007 Pontiac key fob? Instead of heading straight to a dealership and paying a hefty price, you can actually program a new key fob yourself, often saving a significant amount of money. This guide provides a straightforward, step-by-step process to program your 2007 Pontiac key fob right at home.
Before you begin, ensure you have all the necessary components. You’ll need your 2007 Pontiac vehicle and the new, unprogrammed key fob compatible with your car model. It’s also wise to have your vehicle’s owner manual handy, although this guide aims to be comprehensive.
Here’s how to program your 2007 Pontiac key fob:
- Get into the Driver’s Seat: Sit in the driver’s seat of your 2007 Pontiac. While the original instructions mention the passenger seat being easier, the driver’s seat is perfectly suitable and often more convenient.
- Remove the Key from the Ignition: Take the ignition key completely out of the ignition lock cylinder.
- Close All Doors: Make sure all doors of your Pontiac are fully closed.
- Locate and Remove the MALL PGM Fuse: Find the fuse panel in your 2007 Pontiac. Consult your owner’s manual for the exact location if needed. Identify and carefully remove the MALL PGM fuse from the fuse panel.
- Turn Ignition to ACC Position: Insert the key into the ignition and turn it to the ACC (Accessory) position.
- Cycle Ignition ACC and OFF: Turn the ignition from the OFF position to the ACC position, and then immediately back to OFF within one second. Do this quickly.
- Open and Close the Door: Open and then close any door on your 2007 Pontiac.
- Listen for the Chime: If you’ve followed the steps correctly, you should hear an audible chime. This chime indicates that your Pontiac’s remote control door lock receiver has entered programming mode. If you don’t hear a chime, restart the process from step 1.
- Simultaneous Button Press: Take your new key fob. Press and hold both the LOCK and UNLOCK buttons simultaneously for approximately 14 seconds. After around 7 seconds, you might hear a chime confirming synchronization, and after 14 seconds, another chime should confirm successful programming.
- Program Additional Fobs (If Needed): If you have additional key fobs to program, repeat step 9 for each one.
- Remove Key and Reinstall Fuse: Take the key out of the ignition cylinder. Go back to the fuse panel and reinstall the MALL PGM fuse you removed earlier.
- Test Your Fobs: Thoroughly test all programmed key fobs to ensure they are working correctly by locking and unlocking the doors and, if applicable, testing remote start functions.
Important Notes:
- Erase Previous Programming: Be aware that starting this programming sequence will erase all previously programmed key fobs. You must reprogram all fobs you intend to use, including any existing ones.
- Program One Vehicle at a Time: If you are programming fobs for multiple vehicles, do them one at a time to avoid accidentally programming a fob to the wrong car.
- Synchronization and Programming Chimes: Pay close attention to the chimes. They are your confirmation that the process is working.
By following these steps carefully, you can successfully program a 2007 Pontiac key fob and regain full remote access to your vehicle without the expense of a locksmith or dealership programming. This DIY method is a cost-effective solution for 2007 Pontiac owners needing to program their key fobs.