Is your 2009 BMW key fob starting to act up, especially when the temperature drops? You’re not alone. Many BMW owners experience issues with their key fobs in cold weather, often indicated by a decreased range or inconsistent operation. A common culprit is a weak or dead battery inside your key fob. Fortunately, replacing the battery in your 2009 BMW key fob is a straightforward DIY task that can save you a trip to the dealership and keep your key working reliably.
This guide will walk you through each step of replacing the battery in your BMW key fob, ensuring you can restore full functionality and personalized settings.
What You’ll Need for Your BMW Key Fob Battery Replacement
Before you begin, gather the necessary tools and the correct replacement battery. This will make the process smoother and prevent any unnecessary delays.
-
Replacement Battery: You’ll need a VL2020 lithium-ion rechargeable battery. This specific battery type is crucial for your BMW key fob to function correctly. You can find these online from reputable retailers. Ensure you purchase the correct battery with the terminals in the proper orientation (approximately 90 degrees offset).
[Link to a reputable source for VL2020 batteries, e.g., eBay or Amazon, as suggested in the original article, but updated and checked for availability] [Example: You can find the VL2020 battery online. (Link to a relevant product page)] -
Precision Knife (X-acto Knife or similar): A sharp knife is essential for carefully opening the glued key fob casing.
-
Soldering Iron and Solder: You’ll need a soldering iron to desolder the old battery and solder in the new one. If you’re new to soldering, practice on some scrap electronics first.
-
Non-Metallic Pry Tool: A credit card or plastic pry tool will help you gently lift the battery without damaging the circuit board.
-
Optional: Super Glue (Cyanoacrylate Gel) or New Key Fob Housing: To reassemble the key fob.
Step-by-Step 2009 BMW Key Fob Battery Replacement Guide
Now, let’s get started with the battery replacement. Follow these steps carefully to ensure a successful repair.
Step 1: Carefully Opening the BMW Key Fob
The BMW key fob is designed to be sealed, meaning you’ll need to carefully cut it open. Take your time and be patient during this step to avoid damaging the internal components.
-
Inspect the Key Fob: Examine the seam where the two halves of the key fob casing meet. This is where you’ll be cutting.
-
Start Cutting: Using your sharp X-acto knife, gently begin to cut along the seam. Apply consistent, light pressure. It’s better to make multiple shallow passes than to try and cut through in one go. Important: Do not cut too deep! The circuit board (PCB) is located just beneath the surface, and you risk damaging it if you apply too much pressure or cut too deeply.
-
Work Around the Seam: Slowly work your way around the entire seam of the key fob, carefully separating the top and bottom halves. You may need to go over some sections multiple times.
-
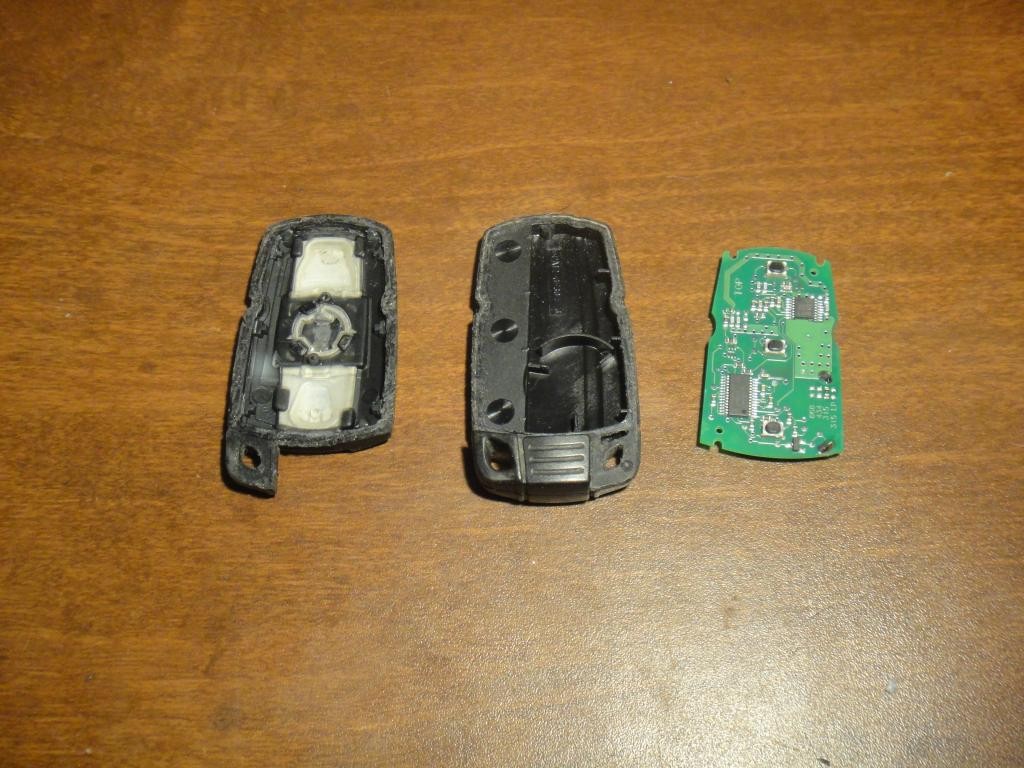
Separate the Casing: Once you’ve cut along the entire seam, carefully pry the two halves of the casing apart. You might need to use the tip of your X-acto knife or a thin plastic tool to gently help separate them. Be gentle to avoid cracking the plastic.
Step 2: Desoldering the Old Battery
With the key fob open, you’ll now need to remove the old battery. This requires desoldering it from the circuit board.
-
Locate the Battery Terminals: Identify the points where the battery is soldered to the circuit board. There are typically two terminals.
-
Apply Tension (Optional but Recommended): Using your non-metallic pry tool (like a credit card), gently apply a small amount of upward pressure to the battery. This can help to loosen the terminal as you apply heat.
-
Desolder the First Terminal: Heat your soldering iron and carefully apply it to one of the battery terminals. Wait for the solder to melt, and then use the pry tool to gently lift that corner of the battery. Start with the corner terminal (as mentioned in the original article), which is generally easier to access first.
-
Desolder the Second Terminal: Repeat the process for the second terminal. Once both terminals are desoldered, the old battery should be free. Remove the old battery and discard it responsibly according to local battery disposal regulations.
Step 3: Soldering in the New Battery
Now it’s time to install the new VL2020 battery.
-
Position the New Battery: Place the new battery into the battery holder on the circuit board, ensuring the terminals align with the solder points. Double-check the battery orientation to match the original battery’s polarity.
-
Solder the First Terminal: Hold the circuit board by the edges. Apply heat from your soldering iron to the first terminal on the circuit board where the battery lead goes through from the other side. Simultaneously, gently push the battery terminal down into the molten solder. The heat will draw the solder up and around the battery terminal, creating a secure connection.
-
Solder the Second Terminal: Repeat the soldering process for the second battery terminal. Ensure both terminals are securely soldered to the circuit board. Allow the solder to cool completely before proceeding.
Step 4: Testing and Reassembly
Before permanently sealing the key fob, it’s crucial to test if the new battery is working correctly.
-
Dry Fit and Test: Carefully place the circuit board back into the key fob housing halves without fully closing it.
-
Test Key Fob Functionality: Go to your 2009 BMW and test all key fob functions: locking, unlocking, remote start (if applicable), and panic button. Also, start the car and check if your personalized settings (like radio presets, seat positions, etc.) are restored.
-
Troubleshooting (If Necessary): If the key fob doesn’t work, re-check your soldering for good connections and correct battery polarity. If issues persist, double-check that you have the correct VL2020 battery.
-
Reassemble the Key Fob: If everything works as expected, you can now reassemble the key fob. You have two options:
-
Glue the Original Housing: Apply a small amount of gel-type cyanoacrylate super glue to the seam of the key fob casing. Press the two halves together firmly and hold until the glue sets. Be careful not to use too much glue, which could seep inside and damage the components.
-
Replace the Housing: For a more professional finish, you can purchase a new replacement key fob housing online. Simply transfer the circuit board into the new housing and snap it closed.
-
Conclusion
Congratulations! You’ve successfully replaced the battery in your 2009 BMW key fob. This DIY repair can save you money and restore the convenience of a fully functional key fob, especially during cold weather. By following these steps and taking your time, you can confidently tackle this task and ensure your BMW key fob is ready to reliably lock, unlock, and start your vehicle for years to come.