Is your 2009 Corvette Key Fob starting to act up, or worse, completely dead? Don’t rush to the dealership just yet. Often, the culprit is simply a depleted battery. Replacing the battery in your 2009 Corvette key fob is a straightforward process you can easily handle yourself with a few simple tools. This guide will walk you through each step, ensuring you get your key fob back in working order in no time.
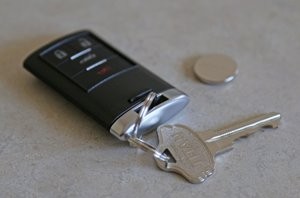
Before we begin, let’s take a look at the type of key fob we’re dealing with. The 2009 Corvette key fob has a distinct design, as shown below.
Tools You’ll Need
- A new CR2032 battery (the standard battery for most key fobs)
- A thin, flat tool like a table knife, a stiff guitar pick, or a plastic pry tool
- A toothpick (optional, but helpful for battery removal)
Step-by-Step Battery Replacement Guide
Step 1: Remove the Emergency Key
Locate the small tab on your 2009 Corvette key fob. Press this tab and simultaneously pull out the emergency key. This key is a physical backup to unlock your car door should your key fob become completely unresponsive.
Step 2: Carefully Separate the Key Fob Halves
This is a crucial step, so pay close attention! Caution: Do NOT attempt to pry open the key fob from inside the key pocket or the opposite recess. These areas are part of a single fob half, and prying there will likely break the plastic.
Instead, carefully insert your thin, flat tool into the seam running around the middle of the key fob. A table knife, guitar pick, or plastic tool can work well. Work the tool gently into the slit between the two halves. Patience is key here. Avoid pushing the tool too deep to prevent damage to the internal tabs that hold the fob together.
Using a screwdriver or letter opener is not recommended as these tools are often too thick and can damage the plastic or leave unsightly marks.
The plastic tabs that secure the two halves run along most of the three sides of the fob. Take your time and apply gentle, increasing pressure until the tabs begin to release.
Step 3: Open the Fob Halves Completely
Once you’ve started to separate the halves, work your way around, first opening one side, then the end opposite the emergency key slot, and finally, the remaining side should come apart easily.
Step 4: Handle the Electronics with Care
With the fob open, be aware that the small circuit board inside might become loose. Handle the green circuit board by its edges only.
Caution: Avoid touching the electronic components or metal surfaces on the circuit board. Static electricity from your body, even if you don’t feel it, can damage sensitive electronics.
If the circuit board does come out, make sure to re-seat it correctly. The side of the green board with circular markings should face down, against the rubber housing within the fob.
Step 5: Remove the Old Battery
The battery is located in one half of the key fob. You can use a toothpick to gently pry out the old CR2032 battery. While there are no electronic components in this half of the fob, avoid damaging the metal spring contact when removing the battery.
Step 6: Install the New CR2032 Battery
Insert the new CR2032 battery with the positive (+) side facing down. Start by sliding one edge of the battery under the metal spring, then gently press the other side down until it clicks into place. Using a toothpick can help you apply even pressure without using excessive force. If the battery doesn’t seat easily, check the orientation and ensure nothing is obstructing it.
Step 7: Reassemble the Key Fob
Ensure the circuit board is correctly seated in its rubber housing. Then, carefully align the two halves of the key fob and press them back together. Work your way around the edges, squeezing until the fob snaps closed. It should not require excessive force. If the halves aren’t closing easily, check the alignment of the internal components, especially the emergency key release button, to ensure it’s properly positioned in its slot.
Step 8: Reinsert the Emergency Key
Slide the emergency key back into its slot until it clicks securely into place.
Your 2009 Corvette key fob should now be powered up and ready to use for another few years. Replacing the battery yourself not only saves you money but also gives you the satisfaction of a quick and easy DIY fix. Enjoy the renewed reliability of your keyless entry system!