Is your 2011 BMW 335i key fob acting up, especially when the temperature drops? You might be facing a common issue: a dying key fob battery. If you’ve noticed your key fob struggling to lock or unlock your car in the cold, or if your BMW is starting without recognizing your personalized settings, a battery replacement is likely the solution. Don’t rush to the dealership and pay a premium. Replacing the battery in your 2011 BMW 335i key fob is a straightforward DIY task you can accomplish at home with a few simple tools and this guide.
What You’ll Need to Replace Your BMW Key Fob Battery
Before you begin, gather these essential items:
- Replacement Battery: You’ll need a VL2020 lithium-ion battery. It’s crucial to get the correct battery type for your BMW key fob to ensure proper function and longevity. You can find these online from reputable sellers.
- Small Phillips Head Screwdriver: For accessing the key fob internals (if applicable to your specific fob type, some are only glued).
- Sharp X-Acto Knife or Precision Blade: To carefully open the glued key fob casing.
- Non-metallic Pry Tool (Credit Card or Plastic Spudger): To gently lift the battery without damaging the circuit board.
- Soldering Iron and Solder: For desoldering the old battery and soldering in the new one. If you’re not comfortable soldering, consider finding a local electronics repair shop for assistance with this step.
- Gel-type Cyanoacrylate Glue (Super Glue Gel): To re-seal the key fob casing after the battery replacement.
Step-by-Step Battery Replacement for Your 2011 BMW 335i Key Fob
Follow these steps carefully to replace your 2011 Bmw 335i Key Fob Battery:
Step 1: Purchase the Correct VL2020 Battery
The first and most important step is to acquire the correct replacement battery. For a 2011 BMW 335i key fob, you’ll need a VL2020 rechargeable lithium-ion battery. Make sure to note the orientation of the battery terminals before removing the old one, as the new battery needs to be soldered in with the same polarity.
Step 2: Carefully Open the Key Fob Casing
The BMW key fob is typically sealed shut. Using a sharp X-Acto knife, carefully begin to cut along the seam of the key fob. Go slowly and apply gentle pressure. Multiple shallow passes are better than trying to force it open in one go. Be extremely cautious not to cut too deep, as you could damage the internal Printed Circuit Board (PCB). Work your way around the entire seam until you can gently pry the fob halves apart.
Step 3: Desoldering the Old Battery
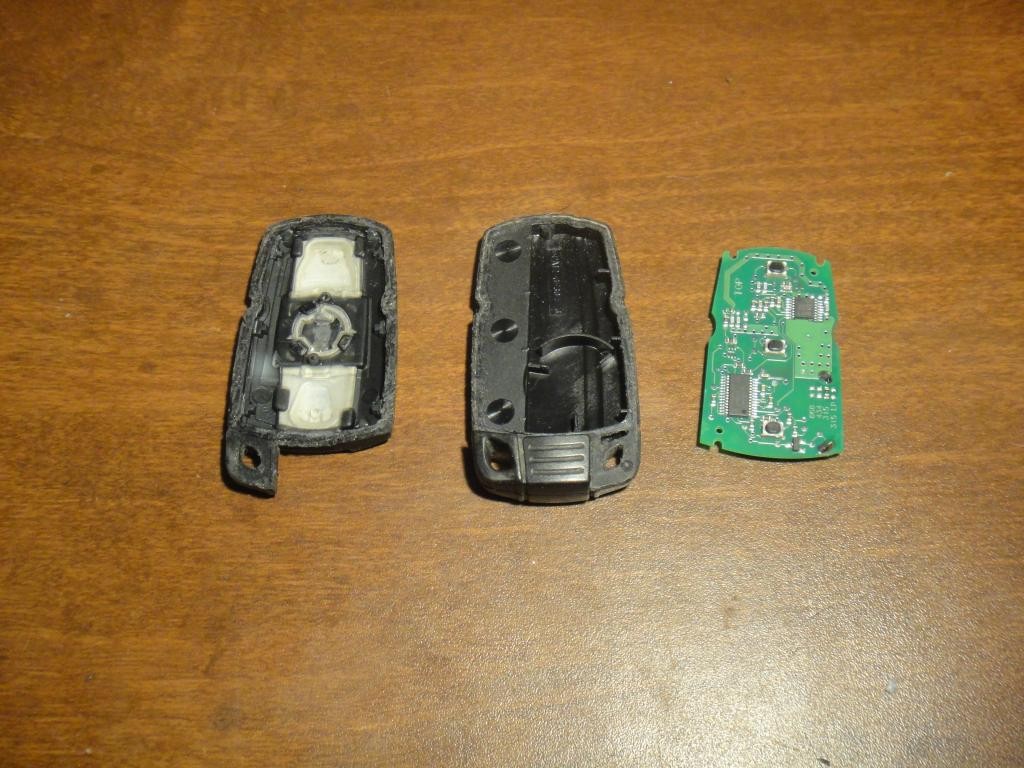
Once the key fob is open, you’ll see the PCB with the battery soldered in place. Use a non-metallic pry tool, like an old credit card or a plastic spudger, to gently apply a small amount of upward pressure to the battery. This will create a slight gap between the battery terminal and the PCB, making desoldering easier.
Focus on desoldering one terminal at a time. Start with the corner terminal. Apply heat from your soldering iron to the solder joint until the solder melts. Once molten, use the pry tool to gently lift that corner of the battery terminal away from the PCB. Repeat this process for the remaining terminals until the old battery is completely free.
Step 4: Soldering the New VL2020 Battery
Place the new VL2020 battery into the battery slots on the PCB, ensuring correct polarity and terminal alignment. Hold the PCB by its edges and gently press down on the new battery to ensure the terminals make good contact with the solder pads on the PCB.
Apply heat from your soldering iron to the solder pad and the corresponding battery terminal. Feed a small amount of solder into the joint to create a secure electrical connection. Solder the middle terminal first, then the corner terminal for easier positioning. Ensure the solder joints are clean and solid.
Step 5: Testing and Reassembling the Key Fob
Before sealing the key fob, dry fit the PCB back into the housing and test the key functionality on your 2011 BMW 335i. Check if the key fob can lock and unlock the doors and if your car starts and recognizes your settings. If everything works correctly, proceed to reassembly.
If your key fob housing is still in good condition, carefully apply a small amount of gel-type cyanoacrylate glue to the edges of the casing. Press the two halves of the key fob firmly together and hold until the glue sets. Avoid using excessive glue to prevent it from seeping into the internal components.
Conclusion
Congratulations! You’ve successfully replaced the battery in your 2011 BMW 335i key fob. This DIY repair can save you a significant amount of money compared to dealership service. By following these steps, you can ensure your key fob is working reliably, even in cold weather conditions. If you are uncomfortable with soldering or opening electronic devices, it’s always best to seek assistance from a professional. Enjoy the reliable performance of your newly powered key fob!