Programming a new key fob for your 2004 Toyota Prius can seem daunting, but it’s a process you can handle yourself with the right instructions. This guide provides a comprehensive, step-by-step approach to programming your 2004 Prius key fob, ensuring you regain full access and functionality. Whether you’ve purchased a new fob from a Toyota dealer or are looking to replace a lost or damaged one, this guide will walk you through the necessary procedures.
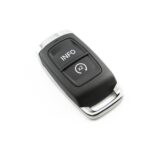
It’s crucial to understand that this programming procedure is specifically designed for brand new key fobs purchased from a genuine Toyota dealer. Aftermarket fobs or those from unauthorized sources, like many found on eBay, might not be fully compatible and may lack Smart Key System (SKS) functionality. Using a genuine Toyota fob is essential for successful programming and optimal performance.
This guide covers three distinct procedures, tailored to different scenarios and key fob types for your 2004 Prius (Generation II). It’s often referred to as the “chicken dance” due to the specific sequence of actions required. Rest assured, these instructions are meticulously compiled and designed to be foolproof.
Procedure A: Initial Programming for Start/Stop Functionality (All Fobs)
This initial procedure is mandatory for all new key fobs, regardless of whether they are black or chrome logo fobs or if your Prius has SKS. This step ensures your new fob can start and stop the engine when inserted into the key port.
Steps:
- Enter your 2004 Prius, close all doors, and ensure they are unlocked. Turn off the car completely.
- Take your old, working key fob and insert it into the key slot, then remove it immediately. Repeat this process four times in quick succession. On the fifth insertion, leave the old fob in the slot.
- Open and close the driver’s side door six times.
- Remove the old fob from the key slot. At this point, your 2004 Prius should be in key fob programming mode. The red anti-theft light on the dashboard will remain illuminated.
- Insert the new, unprogrammed key fob into the slot and leave it there for one full minute. Observe the blinking red anti-theft light. When the light stops flashing and turns off, the start/stop programming for your new fob is complete.
- Remove the new fob from the slot. You have now successfully programmed the basic start/stop function.
Next Steps:
- If your 2004 Prius has the Smart Key System (SKS) and you have a chrome logo key fob, proceed to PROCEDURE B to program remote lock/unlock and smart key functionality.
- If your 2004 Prius does not have SKS or you have a black logo key fob, proceed to PROCEDURE C for programming remote lock/unlock functionality.
Procedure B: Programming for Smart Key System (SKS) Functionality (Chrome Logo Fobs)
This procedure is specifically for chrome logo key fobs and 2004 Prius models equipped with the Smart Key System (SKS). Follow these steps to enable remote lock/unlock and smart key functionality.
Steps:
- Open the driver’s side door and leave it open. Ensure no key fob is in the slot and that the driver’s door is unlocked. (Other doors can be locked or unlocked). Complete the next step within 5 seconds.
- Insert your old, working key fob into the key slot and remove it twice in quick succession. Complete steps 3 and 4 within 40 seconds of completing step 2.
- Close and then open the driver’s side door twice.
- Insert the old fob into the slot and remove it once. Complete steps 5, 6, 7, and 8 within 40 seconds of completing step 4.
- Close and then open the driver’s side door twice again.
- Insert the old fob into the key slot and close the driver’s door.
- Without pressing the brake pedal, press the power button once, wait a second, press it again, wait a second, and press it a third time to turn the car off.
- Remove the old fob from the key slot. Your Prius should now be in “add mode.” Within 3 seconds, the car should automatically lock and unlock the doors to confirm it has entered add mode. (The exact number of lock/unlock cycles might vary slightly by model, but it should cycle at least once). If the doors do not cycle, return to step 1 and repeat. If they do cycle, proceed to step 9.
- Programming the New Fob(s): Steps 9a, 9b, and 9c should be started within 40 seconds of completing step 8.
- 9a: Press and hold both the Lock and Unlock buttons simultaneously on your OLD/MASTER key fob. Hold for a couple of seconds. The door locks should cycle once. If they don’t cycle, replace the CR 2032 battery in your old fob as it might be weak, and try again.
- 9b: Immediately after step 9a, press and hold both the Lock and Unlock buttons simultaneously on your NEW key fob. Hold for about 1.5 seconds. Some users have reported needing to repeat this step twice for success. If it doesn’t work the first time, try executing this step twice.
- 9c: Within three seconds of step 9b, press the Lock button on the NEW key fob. If successful, the door locks will cycle once to confirm successful programming. Be patient, as the lock/unlock cycle might take a moment. If you wait for over a minute and no cycle occurs, proceed to step 10 and test if the SKS functions of your new fob work. If SKS works, it might have programmed despite the lack of immediate feedback.
- 9d: If you need to program additional new key fobs, repeat steps 9a, 9b, and 9c for each new fob. Once you have programmed all new fobs, proceed to step 10 to exit programming mode.
- Exit Programming Mode: To finalize the programming process, simply open and then close the driver’s door, or insert any key fob into the key slot.
Procedure C: Programming for Remote Lock/Unlock (Black Logo Fobs, No SKS)
This procedure is for black logo key fobs on 2004 Prius models without the Smart Key System (SKS). Follow these steps to program remote lock/unlock functionality.
Steps:
- Open the driver’s side door, ensuring no key fob is in the slot and the doors are unlocked.
- Insert your old, working key fob into the key slot and remove it twice within 5 seconds.
- Close and then open the driver’s side door twice.
- Insert the old fob into the slot and remove it once.
- Close and then open the driver’s side door twice again.
- Insert the old fob into the key slot and close the driver’s door.
- Without pressing the brake pedal, press the power button once, wait a second, press it again, wait a second, and press it a third time to turn the car off.
- Remove the old fob from the key slot. Your Prius should now be in “add mode.”
- The car should automatically lock and unlock the doors twice to confirm it has entered add mode.
- Press and hold both buttons (Lock and Unlock) on the NEW key fob simultaneously for about 1.5 seconds.
- Within 3 seconds of step 10, press just the Lock button on the NEW key fob.
- The car should respond with one quick lock/unlock cycle to confirm successful programming. If the car responds with two lock/unlock cycles, the programming was unsuccessful. In this case, try the procedure again, ensure your fob is compatible, or you may have too many fobs already programmed to the car.
- Exit Programming Mode: To finalize the programming, open and then close the driver’s door or insert any key fob into the slot.
Important Notes
- Genuine Toyota Fobs: Always use genuine, new Toyota key fobs purchased from authorized dealers for reliable programming and full functionality.
- Practice Run: It’s advisable to perform a “dry run” of the steps without the fobs to familiarize yourself with the sequence before attempting the actual programming.
- Part Numbers: For reference, here are the OEM part numbers for 2004 Prius key fobs:
- OEM Fob Part # for Smart Access (SKS): 89994-47061
- OEM Fob Part # for Non-Smart Access (Non-SKS): 89070-47180
By following these procedures carefully, you should be able to successfully program your new 2004 Prius key fob and regain full control of your vehicle’s access and starting functions. If you encounter issues, double-check each step and ensure you are using a genuine Toyota key fob.