Is your 2011 Range Rover Key Fob feeling bulky and outdated? Many Range Rover owners feel the same way. The good news is, you can easily upgrade to the sleeker, more modern style of the 2014 Range Rover key fob. This guide will walk you through a simple DIY upgrade process, enhancing both the look and feel of your car key without breaking the bank. This upgrade is straightforward, takes minimal time, and requires only a few basic tools. Let’s dive into how you can modernize your 2011 Range Rover key fob.
What You’ll Need for the Upgrade
Before you begin, gather these essential tools and parts to ensure a smooth and efficient upgrade:
- New Style Key Fob Shell and Chrome Sides: Purchase a genuine 2014 style Range Rover key fob shell and chrome side pieces. While cheaper, fake versions might suffer from button wear and tear. Genuine parts are a worthwhile investment for longevity. The part number you’re looking for is C2D49508. Ensure you are ordering both the fob shell and the chrome side for a complete upgrade. You can find these parts at Land Rover dealerships or reputable online retailers.
- Small Flat Bladed Screwdriver: This will be used to gently pry open the key fob shells and release components.
- File or Dremel Tool with Sander Attachment: A file or Dremel with a sanding attachment is needed to make a minor adjustment to the circuit board (PCB) to fit perfectly into the new shell.
- CR2032 Battery (Optional but Recommended): Since you’re disassembling your key fob, it’s a great opportunity to replace the battery. CR2032 batteries are readily available and inexpensive.
Step-by-Step Guide to Upgrading Your 2011 Range Rover Key Fob
Follow these detailed steps to successfully upgrade your 2011 Range Rover key fob to the 2014 style:
Step 1: Prepare Your Fobs
Get both your old and new key fob shells ready. Familiarize yourself with the components.
Here is the old, bulkier style 2011 Range Rover key fob that we are going to upgrade.
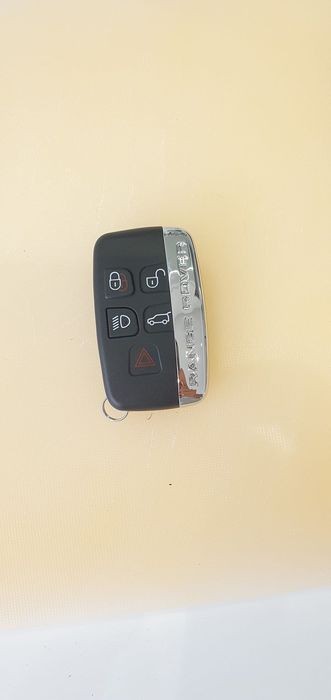
These are the new, sleeker 2014 style Range Rover key fob shells and chrome sides ready for the upgrade process.
Step 2: Open the Old Key Fob Shell
Start by opening your old key fob shell. Flip out the spare key blade, and locate the small black tab inside the battery compartment. Press this tab down while gently prying the left side of the fob open, as if you were changing the battery. A small flat screwdriver can be helpful for this step. Once partially open, remove the battery from the old fob.
Using a small screwdriver to carefully open the 2011 Range Rover key fob shell to access the internal components.
Step 3: Access the PCB
With the battery removed, carefully separate the two halves of the old key fob shell completely. Work your way around the seam, gently levering each corner with the screwdriver to avoid snapping any plastic parts. The shell will eventually come apart, revealing the internal Printed Circuit Board (PCB). The PCB simply lifts out without requiring any force. Set the PCB aside in a safe place.
Step 4: Release the Spare Blade
Now, you need to remove the spare key blade from the old fob. The blade is held in place by a shaped cog mechanism. Gently push the spare blade against the spring tension and pull it outwards. It should slide out smoothly when in the correct position.
Step 5: Open the New Fob Shell
Take your new 2014 style key fob shell and locate the small release catch, usually indicated by an arrow. Push in the direction of the arrow to detach the metal side piece. You will see a small opening revealed in the remote housing. Insert the spare key blade (not the screwdriver!) into this opening and firmly twist. The key blade is wider and distributes pressure better, allowing the new fob shell to snap open without damage.
Using the key blade to twist and open the new 2014 style Range Rover key fob shell, preparing it for component insertion.
Step 6: Insert and Adjust the PCB
Carefully place the PCB from your old fob into the new key fob shell. You’ll notice it almost fits perfectly. However, in the area near where the key shell closes (often circled in online guides), you might see a slight overlap. The PCB may need approximately 1-2mm of space trimmed to allow the new key shell to close completely.
This image highlights the area on the PCB that may need slight trimming to ensure a perfect fit within the new 2014 style key fob shell.
Use a file or Dremel tool with a sanding attachment to carefully trim this edge of the PCB by about 1-2mm. This is a minor adjustment and should only take a few seconds with a Dremel or a couple of minutes with a file. After trimming, place the PCB back into the new remote shell. It should now fit flush, allowing the shell to close properly.
Step 7: Assemble the New Key Fob Shell
Important: Before snapping the new shell completely closed, insert the battery! It’s best to use a new CR2032 battery at this point to ensure optimal performance and longevity. Once the battery is in place, carefully snap the two halves of the new key fob shell together. Press firmly but gently until you hear a click, ensuring it’s securely closed.
Step 8: Insert the Key Blade
Take the spare key blade you removed from the old fob and slide it into the designated slot in the new key fob. It should slide in blade first, into the small metal mechanism.
Inserting the original key blade into the newly assembled 2014 style Range Rover key fob.
Step 9: Attach the Chrome Side
Finally, take the chrome side piece and fit the top edge first, positioning it slightly protruding (about 3mm) from the top of the remote. Then, swing the bottom of the chrome side into place and firmly slide it upwards until it is flush with the remote body.
The final step of attaching the chrome side piece to complete the 2014 style Range Rover key fob upgrade.
Step 10: Test and You’re Done!
Before proceeding with upgrading any other key fobs, test all the functions of your newly assembled key fob. Ensure all buttons work correctly (lock, unlock, etc.) and, most importantly, that the car starts. If everything works as expected, congratulations! You have successfully upgraded your 2011 Range Rover key fob to the more modern 2014 style. Repeat the process for any other key fobs you wish to upgrade.
Enjoy Your Upgraded Key Fob
You’ve now successfully modernized your 2011 Range Rover key fob, giving it a fresh, updated look and a more comfortable feel in your pocket. The 2014 style fob is significantly lighter and less bulky than the original 2011 version – a difference you’ll definitely appreciate daily. Enjoy the enhanced style and functionality of your upgraded Range Rover key fob!