Is your 2011 Range Rover key fob feeling bulky and outdated? Many Range Rover owners feel the same way. Fortunately, upgrading to the slimmer, more modern 2014 style key fob is a straightforward DIY project you can complete in under 15 minutes. This guide will walk you through each step, allowing you to refresh your key fob and enjoy a more refined feel every time you reach for your keys. And while you’re upgrading the shell, it’s also the perfect opportunity to consider a fresh 2011 Range Rover Key Fob Battery replacement, ensuring your remote is powered for years to come.
Step 1: Prepare Your Key Fobs and Gather Necessary Tools
Before you begin, ensure you have all the components ready. You’ll need your existing 2011 Range Rover key fob and the new 2014 style key fob shell. For this upgrade, you will also require a small flat-bladed screwdriver and a file or Dremel tool with a sanding attachment for minor adjustments.
Here’s a look at the original 2011 Range Rover key fob:
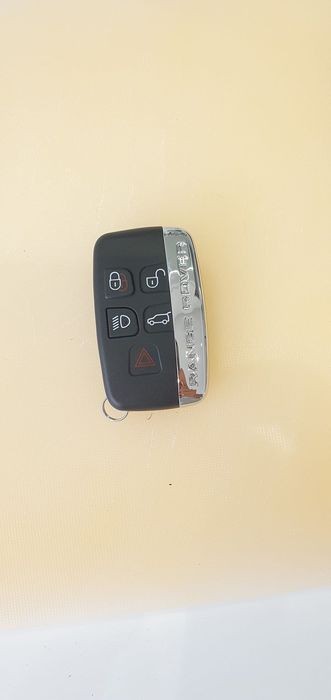
And here are the new, updated key fob shells:
For the best quality and longevity, consider purchasing genuine Land Rover shells and chrome metal sides. While cheaper, aftermarket versions might suffer from button wear. Genuine parts, like part number C2D49508, available from Land Rover dealers, offer superior durability and are designed to last, much like the original 2011 Range Rover key fob battery which typically provides years of service. Purchasing genuine parts ensures a quality upgrade that mirrors the original’s reliability.
If contacting dealers directly isn’t convenient, online marketplaces like eBay often have genuine parts available. One reputable seller is the Land Rover main dealer in Plymouth, accessible through their eBay store “woodacre4x4”.
Step 2: Access the Old Key Fob Shell and Battery Compartment
Begin by flipping open the spare key on your old fob, just as you would when intending to replace the 2011 Range Rover key fob battery. Locate the small black tab at the top of the remote. Press this tab down while gently separating the key fob halves. A small screwdriver can be helpful to initiate the separation. Once slightly open, remove the battery.
Step 3: Fully Separate the Old Key Fob Shell
With the initial opening achieved, carefully work your way around the seam of the key fob shell. Use the small screwdriver to gently lever each corner equally. Patience is key here to avoid snapping any of the internal clips. Gradually, the shell will disengage from its guide holes, allowing you to pull it apart completely.
Once open, you will see the Printed Circuit Board (PCB). This PCB simply lifts out without requiring any force. Set the PCB aside in a safe place as this is the electronic heart of your key fob.
Step 4: Remove the Spare Key Blade from the Old Fob
The spare key blade is held in place by a spring-loaded cog mechanism. To remove it, gently push the spare blade inwards, against the spring pressure, and simultaneously pull it outwards. It should slide out smoothly when in the correct position.
Step 5: Prepare the New Key Fob Shell
Take your new 2014 style key fob shell. Locate the small arrow indicator and push in that direction. This will release the metal side piece. You’ll then see a small opening in the remote shell.
Insert the spare key blade (not the screwdriver, as the key blade distributes pressure more evenly) into this opening and firmly twist. This action will snap the new key fob shell open.
Step 6: Insert and Adjust the PCB for the New Shell
Carefully place the PCB from your old key fob into the new key fob shell. You’ll notice it fits almost perfectly. However, in the area circled in the image below, you might observe a slight overlap where the PCB presses against the key shell edge. Approximately 1.5mm of space is needed for the shell to close correctly. This small area needs a minor trim.
Using your file or Dremel tool, lightly sand down the indicated edge of the PCB by 1-2mm. This is a minimal adjustment; a Dremel will accomplish it in seconds, while a file will take a few minutes. After trimming, re-insert the PCB into the new shell. It should now fit flush, as shown.
Step 7: Assemble the New Key Fob Shell
Before snapping the new shell completely together, this is the ideal moment to install a new 2011 Range Rover key fob battery. The correct battery type is CR2032, a widely available and long-lasting option. Even if your current battery is still working, replacing it now ensures optimal performance and prevents potential issues down the road. A fresh battery will maximize the lifespan and reliability of your upgraded key fob.
With the new battery in place, firmly but gently press the two halves of the new key fob shell together until they snap closed securely.
Step 8: Re-insert the Key Blade
Slide the spare key blade back into its slot in the new key fob. Ensure it is inserted blade-first into the small metal mechanism.
Step 9: Attach the Chrome Side Piece
Take the chrome side piece and align it with the top of the key fob, letting it protrude about 3mm over the top edge. Swing the bottom of the chrome piece inwards towards the fob, and then firmly slide it downwards until it is flush with the remote’s side.
Step 10: Final Testing and Completion
Before proceeding with upgrading any other key fobs, test all the functions of your newly assembled remote. Ensure all buttons work correctly and, crucially, that the car starts. This confirms a successful upgrade.
Upon successful testing, you’ve completed the upgrade! You now have a significantly more compact and modern 2014 style key fob. The weight difference is noticeable – the older shell alone weighed 68g empty, while the new shell, even with the PCB, battery, key blade, and keyring, comes in at just 69g. This lighter, sleeker design is a welcome improvement for daily carry.
Enjoy your upgraded Range Rover key fobs! And remember, maintaining your key fob, including timely 2011 Range Rover key fob battery replacements, ensures continued convenience and reliability.