Is your Ford key fob looking worn out, scratched, or simply tired? Replacing the case is a straightforward and cost-effective way to give it a fresh, new look without needing to replace the entire key fob system. This guide will walk you through the process of a Ford Key Fob Case Replacement, using an aftermarket case to revitalize your existing key fob. We’ll break down each step, from safely disassembling your old fob to assembling the new case, ensuring you can confidently complete this DIY project.
First, it’s important to decide if you want to use one of your current, programmed keys for this project. As the process involves opening and transferring the electronics, you might prefer to use a new, unprogrammed key fob shell. This way, you preserve your original keys intact. You can easily find replacement fobs online. For this guide, we will assume you are working with a new, blank key fob for practice before potentially upgrading your main keys. Programming a new Ford key fob is generally simple if you have two existing, programmed keys.
Once you have your new replacement fob and your chosen aftermarket case – in this example, we’re using an AJT Designs case – you’re ready to begin. AJT Designs offers helpful videos online, but this guide will provide a detailed written walkthrough, highlighting any potential variations you might encounter during your ford key fob case replacement.
Let’s get started with disassembling your original Ford key fob.
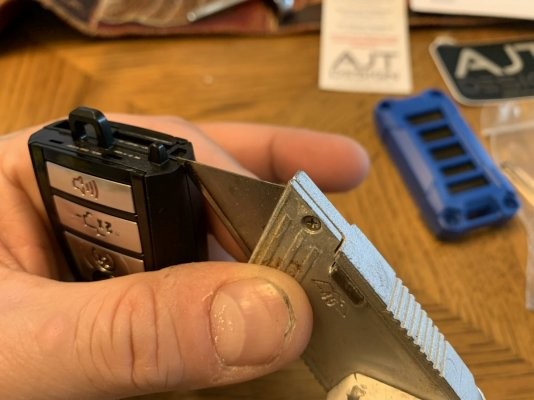
The first step is to detach the back cover of your key fob and remove the battery. This is a standard procedure for most key fobs and usually involves a small release latch or a simple pry point. After removing the battery, you’ll need a sharp utility blade. A carbide blade works well for this task. Carefully begin to cut along the seam where the two halves of the key fob case are joined. Apply gentle, consistent pressure, running the blade repeatedly along the seam. The goal is to cut through the adhesive that holds the two parts together. Pay extra attention to the corners, pressing the blade slightly deeper to aid in separating the halves. Be cautious not to insert the blade too deeply as the circuit board is located just inside the case.
Continue working around the seam until the case begins to split open. You may need to gently pry the halves apart once the adhesive is sufficiently cut. Exercise caution during this step to avoid accidentally launching the circuit board out of the case, as can happen when the two halves suddenly separate.
With the old key fob case disassembled, you are now ready to assemble the new case. Begin by placing the button pads into their designated slots in the front half of the new AJT Designs case. These kits are generally designed to be universal, making it quite intuitive to place the buttons correctly. In this example, red panic buttons are being used for a customized look. Before proceeding further, it’s a good idea to place the circuit board onto the back half of the new case to get a feel for how it will fit and ensure there are no obstructions.
Next, take the large black rubber sealing gasket included in the AJT Designs kit. Position this gasket over the back of the buttons that you just placed into the front case half. Press the gasket firmly down until it sits flush within the case. This gasket provides a seal to protect the internal electronics from dust and moisture once the case is fully assembled.
Continue to the next steps to finalize your ford key fob case replacement.