Want to give your 2011 Range Rover key fob a fresh, modern look? Many owners of the 2011 Range Rover aren’t thrilled with the original, bulkier key fob design. If you’re in the same boat, you’ll be happy to know that upgrading to the sleeker, more compact 2014 style key fob is a straightforward DIY project. This guide will walk you through each step of the process, allowing you to easily replace your old key fob and enjoy a more stylish and pocket-friendly remote. This upgrade not only enhances the aesthetics but also improves the feel and convenience of your Range Rover key.
Step 1: Gather Your Supplies
Before you begin, make sure you have everything you need for a smooth and efficient upgrade. First, you’ll need the new-style key fob shells. While cheaper, aftermarket versions are available, it’s highly recommended to opt for genuine Land Rover parts. This ensures better quality and longevity, especially concerning the button markings, which are known to wear off quickly on replicas. Genuine shells and chrome metal sides, part number C2D49508, can be sourced from Land Rover dealerships or reputable online retailers. Purchasing genuine parts might cost around $30-$50 per set, a worthwhile investment for durability and a premium feel.
Here’s what you’ll need:
- New Key Fob Shells (Genuine Land Rover part C2D49508): This includes both the front and back shell pieces and the chrome side trim.
- Small Flat-Bladed Screwdriver: For gently prying open the key fob shells.
- File or Dremel with Sander Attachment: For minor adjustments to the circuit board (PCB) to fit the new shell.
- CR2032 Battery (Optional but Recommended): Since you’re opening the fob anyway, consider replacing the battery for preventative maintenance.
Get your old and new key fobs ready for the upgrade.
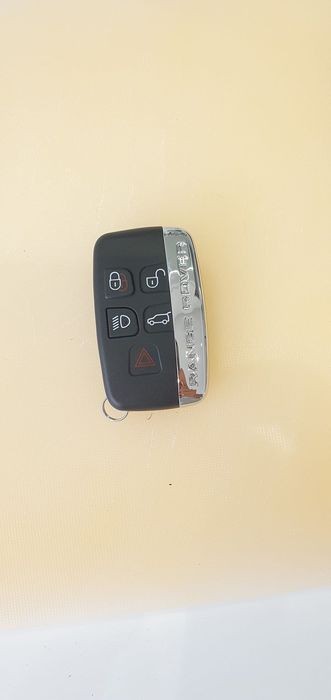
These are the new, 2014 style key fob blanks that will replace the old fobs.
Step 2: Open Your Old Key Fob Shell
Start by releasing the emergency key blade from your old fob. Then, locate the small black tab at the top of the remote, similar to how you would begin a battery replacement. Press this tab down while gently prying the left side of the fob shell open. A small flat-bladed screwdriver can be helpful for initiating the separation. Once slightly open, remove the battery from the old key fob.
Step 3: Separate the Key Fob Shell Halves
With the battery removed and the initial opening created, carefully separate the two halves of the key fob shell. Work your way around the seam, gently levering each corner with the flat-bladed screwdriver. Apply even pressure to avoid snapping any of the plastic clips. The shell halves will gradually disengage from their guide holes and pull apart, revealing the internal components.
Step 4: Remove the Circuit Board (PCB)
Inside the opened key fob shell, you’ll see the printed circuit board (PCB). This electronic component is responsible for transmitting the signals to your Range Rover. The PCB simply lifts straight out of the shell without requiring any force or special tools. Set the PCB aside in a safe place, away from static or moisture, as it’s crucial for the functionality of your upgraded key fob.
Step 5: Detach the Emergency Key Blade
Now, focus on removing the emergency key blade from the old fob shell. The blade is held in place by a shaped cog mechanism with a spring. To release it, gently push the spare blade inwards, against the spring tension. While maintaining this pressure, pull the blade outwards. It should slide out smoothly when in the correct position.
Step 6: Prepare the New Key Fob Shell
Take your new key fob shell and locate the small arrow indicator. Push in the direction of the arrow to release the chrome side trim. This will reveal a small slot on the side of the new fob shell. Insert the emergency key blade (from either your old or new set, the old one is fine). Using the key blade for leverage, firmly twist it within the slot. This action will snap the new key fob shell open, separating its two halves.
Step 7: Install and Adjust the PCB
Carefully place the PCB from your old key fob into the new key fob shell. You’ll notice that it almost fits perfectly. However, in the area near where the key ring attaches, the PCB might press slightly against the inside of the shell. This slight pressure, indicated in the image, prevents the new shell from closing completely.
To resolve this, you’ll need to slightly trim the edge of the PCB in the circled area. Using a file or a Dremel with a sanding attachment, carefully remove approximately 1-2mm of material from the PCB edge. This is a minor adjustment, and with a Dremel, it should only take about 15 seconds. If using a file, it might take a few minutes. After trimming, place the PCB back into the new shell. It should now fit flush, allowing the shell to close properly.
Step 8: Reassemble the Key Fob Shell
Before snapping the new key fob shell together, remember to insert the battery! This is an opportune moment to install a fresh CR2032 battery to ensure optimal performance and avoid needing to reopen the fob soon. Once the battery is in place, carefully align the two halves of the new key fob shell and press them firmly together. They should snap securely, closing the fob completely.
Step 9: Reinsert the Emergency Key Blade and Chrome Side
Slide the emergency key blade back into its slot in the newly assembled fob. It goes in blade-first, engaging with the internal mechanism. Finally, take the chrome side trim and fit the top edge first, allowing it to protrude about 3mm beyond the top of the remote. Then, swing the bottom of the chrome side inwards and firmly slide it downwards until it’s flush with the remote casing.
Step 10: Test Your Upgraded Key Fob
With the upgrade complete, it’s essential to test that everything is working correctly. Before moving on to upgrading any other key fobs, test all the functions of the newly assembled remote on your 2011 Range Rover. Check that the lock, unlock, and other remote functions are working as expected, and crucially, ensure that the car starts with the upgraded key fob.
Once you’ve confirmed that everything is functioning correctly, you’ve successfully upgraded your 2011 Range Rover key fob! You can now enjoy the more modern, lightweight design. The difference in weight and feel compared to the old, bulkier fob is immediately noticeable and adds a touch of refinement to your Range Rover ownership experience.