It’s a familiar scenario for many drivers: you approach your car, press the unlock button on your key fob, and… nothing. No flashing lights, no satisfying click of the doors unlocking. You press it again, maybe even point it directly at the car, but still no response. Before you start worrying about car trouble, the most likely culprit is a dead battery in your key fob. Fortunately, replacing it is a straightforward task you can easily handle yourself, saving you time and potentially money compared to a dealership visit. This guide will walk you through the simple steps of how to change the battery in your key fob and get you back on the road quickly.
Recognizing When Your Key Fob Battery Needs Replacing
Before diving into the battery replacement process, it’s helpful to confirm that a dead battery is indeed the issue. While key fobs are generally reliable, batteries do eventually lose their charge. Here are some common signs indicating it might be time for a new key fob battery:
- Reduced Range: You need to be much closer to your car than usual for the key fob to work.
- Intermittent Operation: The key fob works sometimes but not others, becoming increasingly unreliable.
- No Response: The most obvious sign – pressing buttons on your key fob produces no reaction from your car at all.
- Indicator Light Dim or Absent: Some key fobs have a small LED light that illuminates when a button is pressed. If this light is dim or doesn’t light up, it could signal a low battery.
If you’re experiencing any of these symptoms, changing the battery is the first and easiest troubleshooting step to take.
Gathering the Tools for Key Fob Battery Replacement
The good news is that you likely already have the few simple tools needed for this task right at home. Here’s what you’ll typically need:
- New Battery: This is the most crucial item. Key fobs usually use small, coin-cell batteries. Common types include CR2032, CR2025, and CR1632. Check your owner’s manual or the old battery itself to identify the correct type for your key fob. You can purchase these batteries at most drugstores, supermarkets, and electronics stores.
- Small Flathead Screwdriver (or similar tool): You’ll need a small, flat tool to gently pry open the key fob casing. A small flathead screwdriver from an eyeglass repair kit works perfectly. Alternatively, you can use a butter knife, a guitar pick, or even another car key in a pinch, but be careful not to scratch the fob casing.
- Soft Cloth (optional): Using a soft cloth can help protect the key fob casing from scratches while prying it open.
Step-by-Step Guide to Changing Your Key Fob Battery
Now that you have your tools and new battery, let’s get started with the battery replacement process. Most key fobs are designed to be opened relatively easily for battery changes. Here’s a general step-by-step guide:
-
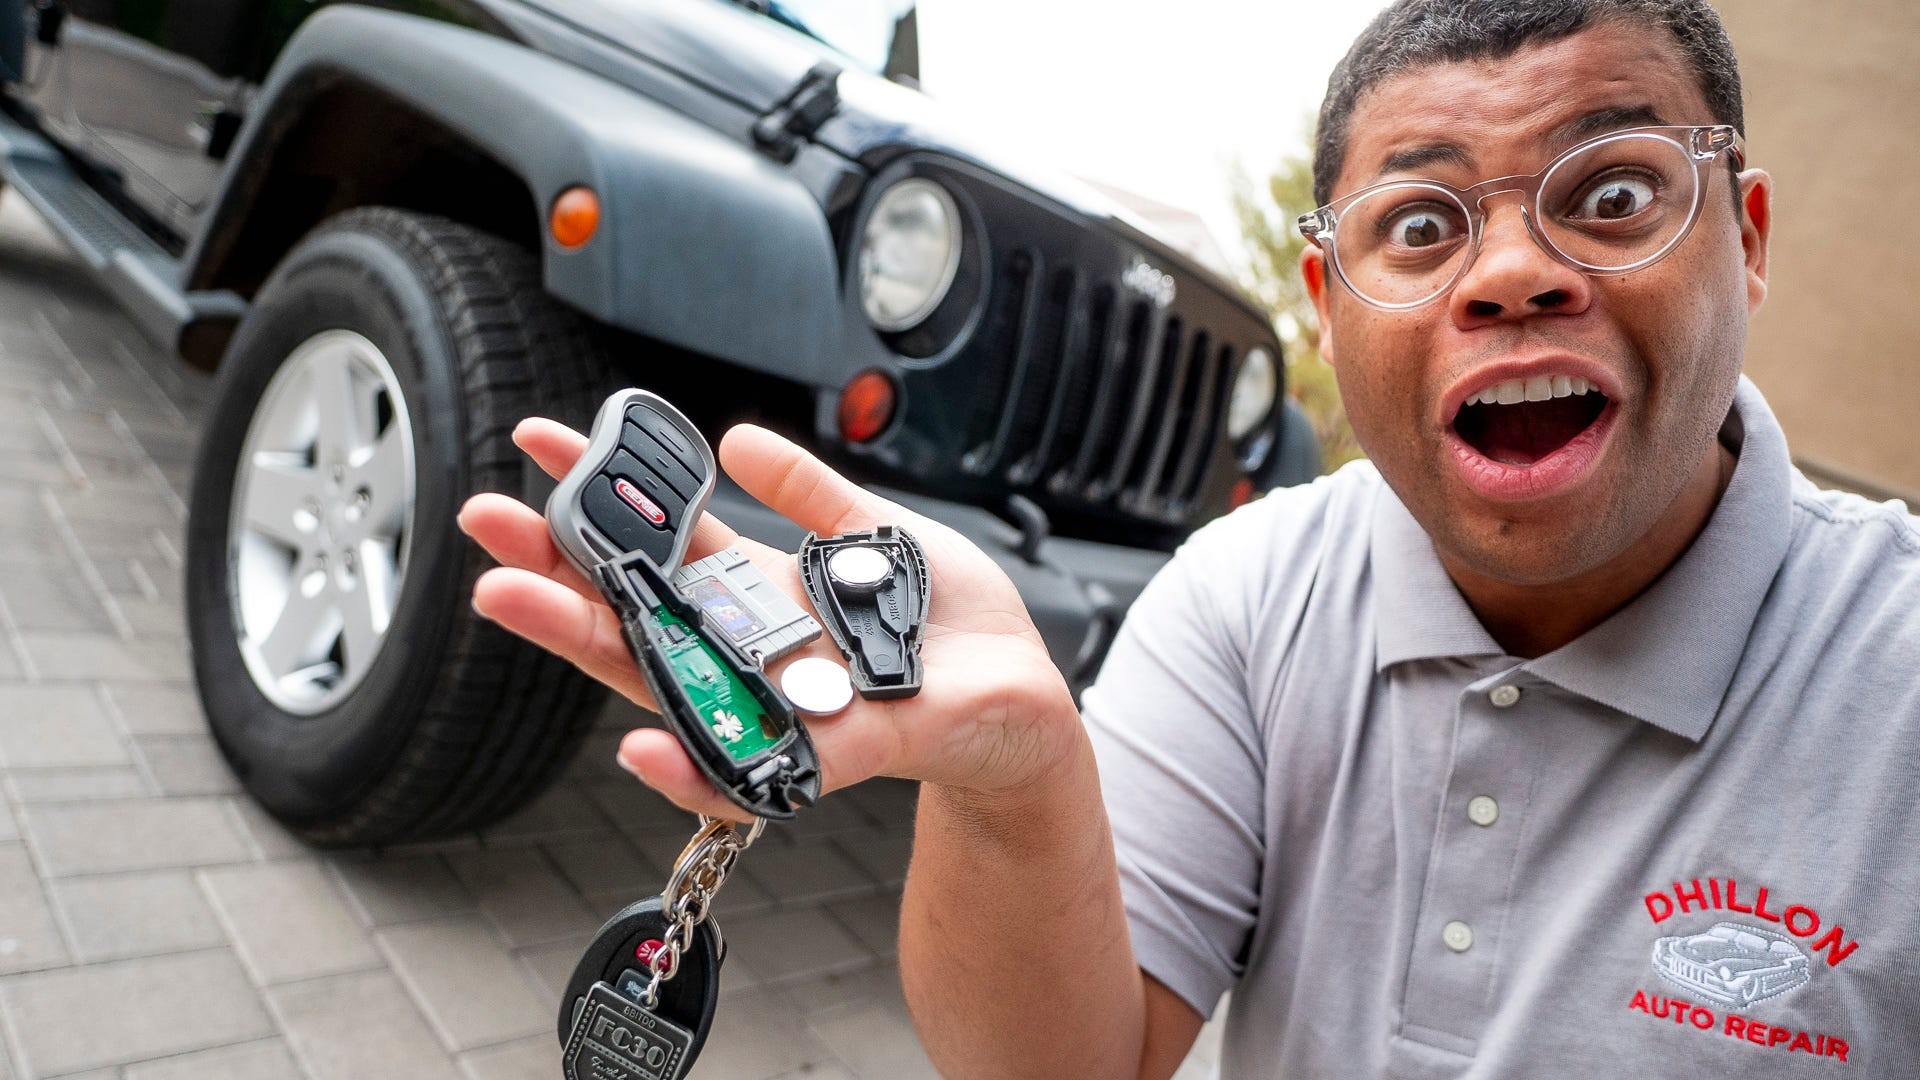
Locate the Notch or Opening Point: Examine your key fob closely. Most fobs have a small notch or seam somewhere around the edge of the casing, indicating where it can be opened. Sometimes, you might need to slide or remove a physical key from the fob first to reveal this notch.
-
Carefully Open the Key Fob: Using your small flathead screwdriver or chosen tool, gently insert it into the notch or seam. Apply gentle pressure to pry the two halves of the key fob casing apart. Work slowly and carefully to avoid damaging the plastic casing. If you encounter resistance, double-check that you are prying at the correct location.
-
Access and Remove the Old Battery: Once the fob is open, you’ll see the battery compartment. Take note of the orientation of the old battery before removing it – specifically, which side is facing up (positive or negative). This is important for installing the new battery correctly. You may be able to simply lift the old battery out with your fingers. If it’s held in place more tightly, you can use the tip of your screwdriver to gently nudge it out.
-
Install the New Battery: Take your new battery and install it in the battery compartment, matching the orientation of the old battery you just removed. Ensure it sits snugly in place. Incorrect battery orientation is a common reason why a newly replaced battery might not work.
-
Reassemble the Key Fob: Carefully snap the two halves of the key fob casing back together. Press firmly until you hear or feel them click securely into place. Ensure there are no gaps or loose parts.
-
Test Your Key Fob: Press the unlock or lock button on your key fob to test if it’s working. Ideally, test it from a normal distance from your car to ensure the range is restored. If it works, congratulations – you’ve successfully changed your key fob battery! If it doesn’t work immediately, double-check the battery orientation and that the battery is the correct type.
Tips for a Smooth Key Fob Battery Replacement
- Work on a Clean, Flat Surface: This will prevent small parts, like the battery, from rolling away and getting lost.
- Handle the Battery Carefully: Avoid touching the flat surfaces of the new battery with your bare fingers as much as possible. Oils from your skin can reduce battery life. Use gloves or hold the battery by its edges.
- Check Your Owner’s Manual: While the general process is similar, your car’s owner’s manual may have specific instructions or diagrams for your key fob model.
- Properly Dispose of the Old Battery: Coin-cell batteries can be harmful to the environment. Check your local regulations for proper battery disposal or recycling options. Many stores that sell batteries also offer battery recycling drop-off points.
By following these simple steps, you can confidently change your key fob battery yourself and avoid unnecessary trips to the dealership. This small DIY task can save you both time and money, keeping you conveniently connected to your vehicle.