Is your 2008 Cadillac key fob starting to feel unresponsive? You might be facing the common issue of a dead or dying key fob battery. Don’t worry, replacing it is a straightforward task you can easily handle yourself, saving you time and money compared to dealership service. This guide, brought to you by the auto experts at keyfobprog.com, will walk you through each step to replace your 2008 Cadillac key fob battery quickly and efficiently.
Replacing your key fob battery is essential for maintaining the convenience and security features of your Cadillac. A weak battery can lead to frustrating situations, such as difficulty locking or unlocking your doors remotely, or even starting your vehicle. Fortunately, this is a simple maintenance task that requires minimal tools and technical expertise.
Let’s get started with replacing your 2008 Cadillac key fob battery in a few easy steps.
Step 1: Identify Your Key Fob and Gather Your Tools
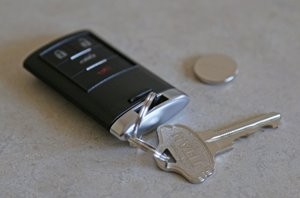
First, make sure your key fob matches the one shown below. While this guide is specifically for the 2008 Cadillac key fob, similar models may have a comparable battery replacement process.
For this battery replacement, you’ll need just a few simple tools:
- A new CR2032 battery: This is the standard battery size for most key fobs, including your 2008 Cadillac. You can find these at most drug stores, supermarkets, and online retailers.
- A thin, flat tool: A table knife, a stiff guitar pick, or a plastic trim tool will work perfectly to gently pry open the key fob. Avoid using thick or sharp tools that could damage the plastic casing.
Step 2: Remove the Emergency Key
Before attempting to open the key fob casing, the first crucial step is to remove the emergency key. This key is typically located at the bottom of your key fob.
Locate the small release tab on your key fob. Press and hold this tab while simultaneously pulling out the emergency key. Set the key aside in a safe place.
Important Caution: When attempting to open the key fob, do not try to pry it open from inside the key pocket where the emergency key was housed. This area is part of a single half of the fob, and prying here will likely break the plastic. Similarly, avoid prying within any recesses on the opposite side, as these are also contained within a single fob half and are not designed for separation.
Step 3: Carefully Open the Key Fob Casing
Now, using your chosen thin, flat tool, carefully begin to separate the two halves of the key fob. The seam where the two halves join is usually visible around the edge of the fob.
Gently insert the edge of your tool into the slit between the two halves. Work patiently and gradually apply pressure. Avoid forcing the tool too deep into the slit, as this could damage the internal tabs that hold the fob together.
It’s important to take your time during this step. The plastic tabs run along most of the three sides of the fob. Apply gentle, increasing force until you feel the tabs start to release. Work your way around the seam, gradually separating the halves.
Once you’ve created a small opening, work one side open first, then the end opposite where the emergency key was located. Finally, the remaining side should separate relatively easily.
Step 4: Access and Remove the Old Battery
With the key fob now open, you’ll see the internal components. Be careful when handling the electronics board, as it might be loose within the rubber seating.
Caution: To prevent damage from static electricity, handle the green electronics assembly by its edges only. Avoid touching the electronic components or metal surfaces. Static discharge, even if imperceptible, can harm sensitive electronics.
If the internal parts become separated, ensure you correctly reposition the green circuit board. The side with circular markings should face down, resting against the rubber component that holds it in place within the fob casing.
Now, locate the old CR2032 battery. You can use a toothpick or your fingernail to gently pry the old battery out.
Be careful not to damage the small metal spring contact that connects with the battery.
Step 5: Install the New CR2032 Battery
Take your new CR2032 battery and install it with the positive (+) side facing down.
Start by sliding one edge of the battery under the metal spring contact. Then, use a toothpick or your finger to gently press the battery down into place. If the battery doesn’t easily seat, double-check the orientation and ensure nothing is obstructing it. Avoid using excessive force, as this could indicate incorrect placement or damage to the contacts.
Step 6: Reassemble the Key Fob
Before closing the key fob, ensure the electronics assembly is correctly seated within its rubber housing. Then, carefully align the two halves of the key fob and press them back together.
Work your way around the edges, pressing firmly until the two halves snap securely back together. You should hear a click as the plastic tabs re-engage. If you encounter resistance, stop and check the alignment of the internal components, particularly the button for releasing the emergency key, ensuring it fits correctly into its slot.
Step 7: Test Your Key Fob
Finally, slide the emergency key back into its place until it clicks and locks. Now, test your 2008 Cadillac key fob to ensure it’s working correctly. Try locking and unlocking your doors remotely and starting your vehicle.
With a fresh battery, your key fob should now be functioning like new, ready to provide reliable service for another few years. By following these simple steps, you’ve successfully replaced your 2008 Cadillac key fob battery and saved yourself a trip to the mechanic or dealership!