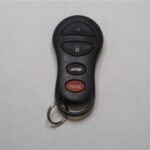
Lost your 2017 Chevy Key Fob and only have one or none left? It can be a stressful situation, but thankfully, programming a new key fob for your 2017 Chevrolet vehicle can be done even without a recognized, working fob. While instructions often assume you have two working transmitters, this guide focuses on programming when you don’t have a recognized key, or only have one. This process will allow you to program a new key fob yourself, saving you a trip to the dealership.
Programming Your 2017 Chevy Key Fob Without a Recognized Transmitter
This procedure is designed for when you do not have a working key fob, or only have one, and need to program a new one for your 2017 Chevy. You can program up to eight transmitters using this method. Please note that in Canada, regulations may require you to visit your dealer for this procedure. This process will take approximately 30 minutes. Ensure your vehicle is off and all key fobs you intend to program are with you before starting.
Here are the steps to program your 2017 Chevy key fob:
-
Initiate Key Learning: Begin by locating the key lock cylinder cap on your driver’s side door handle. Remove this cap. Insert the vehicle key into the exposed key lock cylinder. Turn the key to the unlock position five times within a quick 10-second period. After doing this correctly, the Driver Information Center (DIC) will display a message: “REMOTE LEARN PENDING, PLEASE WAIT.”
-
First 10-Minute Wait: Now, you need to wait. Let the vehicle sit for 10 minutes. After this duration, the DIC should change its display to “PRESS START BUTTON TO LEARN.” Once you see this message, press the POWER button (often marked as POWER O on the center console or center stack of your Chevy). The DIC will revert back to displaying “REMOTE LEARN PENDING, PLEASE WAIT.”
-
Second 10-Minute Wait: Repeat the waiting process. Wait another 10 minutes until the DIC again displays “PRESS START BUTTON TO LEARN.” Press the POWER button once more. Again, the DIC will show “REMOTE LEARN PENDING, PLEASE WAIT.”
-
Third 10-Minute Wait and Ready State: You need to repeat the 10-minute wait one last time. After the third 10-minute period, the DIC will display “PRESS START BUTTON TO LEARN” for the final time. Press the POWER button. This step is crucial as it clears the memory of any previously programmed key fobs. After this, the DIC should display “READY FOR REMOTE #1,” indicating that the system is ready to learn your new key fob.
-
Prepare the Transmitter Pocket: Open your center console and locate the storage area. Inside, you will find a rubber mat. Remove this rubber mat to expose the transmitter pocket underneath.
-
Program the New Key Fob: Take your new 2017 Chevy key fob and place it directly into the transmitter pocket you just revealed.
-
Complete Programming for First Fob: With the new key fob in the pocket, press and hold the POWER button for approximately two seconds. When the key fob is successfully programmed, the DIC will confirm by displaying a message indicating it is ready to program the next remote, if you have more to program.
-
Program Additional Key Fobs (Optional) and Exit: Remove the programmed key fob from the transmitter pocket. To program any additional key fobs, repeat Steps 5 through 7. If you are finished programming all your key fobs, press and hold the POWER button for a longer duration, around 12 seconds. This action will exit the key fob programming mode.
-
Reassemble Key Fob: Finally, return the actual key back into the new transmitter, if it was separate.
By following these steps, you should be able to successfully program a new 2017 Chevy key fob even without a previously recognized transmitter. This DIY method can be a convenient solution to get you back on the road quickly.

