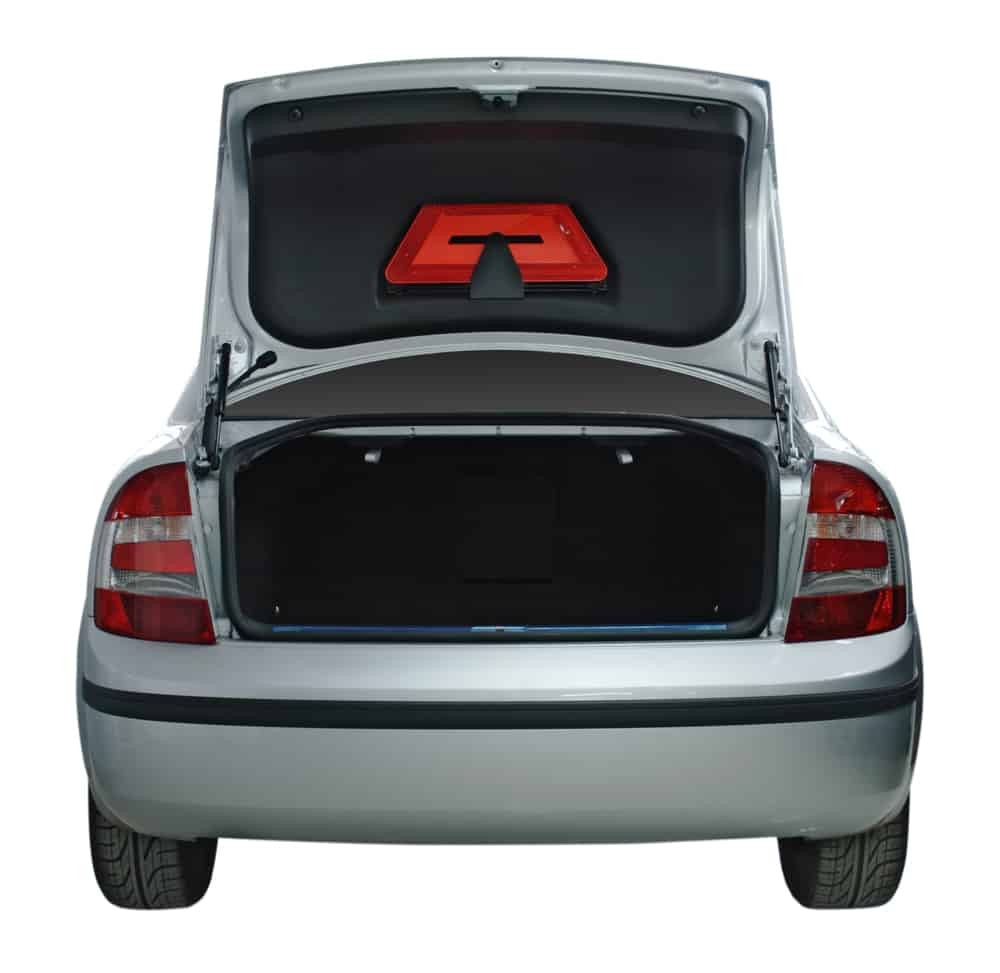
It’s surprisingly easy for your car boot lid to suffer damage. Whether it’s a minor collision on the road, a scrape while parking too close to a wall, or even just general wear and tear, dents and other issues can appear over time. Furthermore, exposure to the elements can lead to rust, damaged seals, and problems with wiring and locking mechanisms on your car boot lid. A simple visual inspection is often enough to determine if a replacement is necessary.
Purchasing a replacement car boot lid is usually straightforward. However, it’s important to note that boot lids vary significantly across different car models and makes. Some incorporate lights and complex wiring systems, while others are simpler, basic covers. While most modern vehicles use hydraulic systems for smooth operation of the boot lid, making the replacement process manageable even for someone with basic mechanical skills, the weight of the part means having an assistant is highly recommended for safety and ease.
Tools You’ll Need:
- Spanner
- Socket set
- Screwdriver
Step 1: Disconnecting the Hydraulic Cylinders
Begin by locating the hydraulic cylinders that support the boot lid. Using your spanner, carefully loosen and remove the bolts at the upper end of each cylinder where they connect to the car’s body. Once these top bolts are free, move to the lower connection point. Disconnect the bolt that secures the cylinder to the car boot lid. With both bolts removed, gently push each cylinder out of its mounting bracket using the palm of your hand. They should detach with moderate pressure.
Step 2: Unplugging the Wiring
Next, trace any wiring that runs from inside the car’s frame into the car boot lid. These wires are typically connected to the vehicle’s electrical system via plugs. These connections are designed to be relatively easy to disconnect. In some cases, you might find a single universal plug that manages all electrical connections to the boot lid. Once you locate and disconnect the plug(s), carefully leave the loose plug inside the car body, ensuring it’s safely out of the way.
Step 3: Detaching the Boot Lid Hinges
Now, focus on the hinges that secure the car boot lid to the car body. Locate the bolts on either side of the hinges. Accessing these hinge bolts can sometimes be a bit tricky, potentially requiring you to lean into the boot space for better reach. This is where having an assistant becomes invaluable. Ask someone to firmly hold the car boot lid in place during this step. The lid is heavy, and without support, it could swing downwards unexpectedly, potentially causing injury or further damage. Working one hinge at a time, remove all the bolts from one hinge, and then repeat the process for the hinge on the opposite side.
Step 4: Lifting Off the Old Boot Lid
With all hinges detached, and with your assistant’s help, slowly and carefully lift the old car boot lid away from its position on the car body. Bring it gently down to the ground, ensuring it is placed safely and won’t roll or fall. This is an opportune moment to clean any accumulated dirt, debris, or moisture from around the sill and seal area on your car body that was previously covered by the boot lid.
Step 5: Installing the New Boot Lid
Now, prepare your replacement car boot lid. Carefully lift the new lid into position. With your assistant holding it securely in place, align the hinges with their mounting points on the car body and begin bolting them back in. Ensure all bolts are tightened to the correct torque to securely fasten the new lid. After the hinges are secured, reconnect the hydraulic cylinders. At this stage, test the movement of the car boot lid. Open and close it gently to check for smooth operation. If you notice any stiffness, applying a small amount of lubricant to the hinges can help ensure smoother movement.
Step 6: Reconnecting the Electrical System
Finally, reconnect the electrical connectors you detached earlier. Ensure that all connectors are firmly and correctly fixed back into their corresponding sockets. Once all electrical connections are re-established, turn on your car’s ignition and test all the lights associated with the car boot lid, such as brake lights, license plate lights, and any interior boot lights, to confirm they are functioning correctly.
Once you have completed all steps, test the operation of your newly installed car boot lid thoroughly. Open and close it several times using the car’s release lever, typically located inside the car. Verify that the movement is smooth throughout its range and that the lid locks securely in place when closed. After confirming everything works as expected, your car should be ready to get back on the road with its functional and secure car boot lid.