Do you recall when car keys were just simple pieces of notched metal? Today, almost every vehicle comes equipped with a keyless remote, making locking and unlocking your car doors incredibly easy. No more fumbling to insert a key to open the door or start the ignition. They’re also significantly more secure than traditional keys. It’s truly remarkable how far automotive technology has advanced. This keyless remote, commonly known as a key fob, utilizes a radio frequency identification (RFID) chip and antenna, employing radio frequencies to communicate with your car’s locking system.
Compared to their old-fashioned counterparts, these key fobs are incredibly futuristic and convenient – until the battery dies. Suddenly, you might find yourself unable to access your vehicle. Fortunately, changing the battery in your Toyota key fob is a straightforward process you can do yourself. This guide from keyfobprog.com, your automotive repair expert, will walk you through each step of changing your Toyota key fob battery from the comfort of your home, saving you time and potential dealership costs.
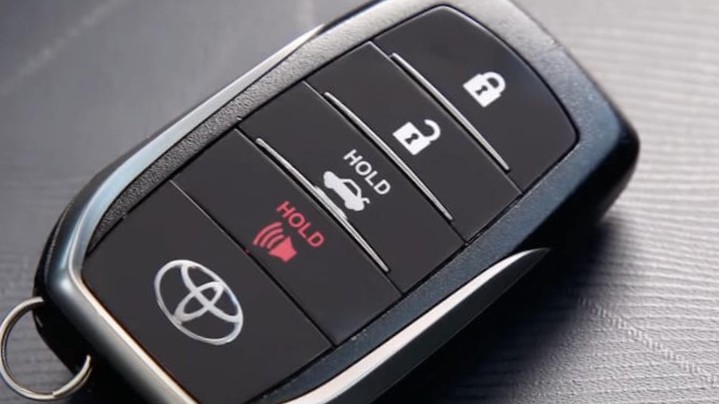 Toyota key fob and tools for battery replacement
Step-by-Step Guide to Toyota Key Fob Battery Replacement
Knowing how to perform a Toyota key fob battery change is a valuable skill for any car owner. The process is generally quite simple and requires minimal tools. Here’s your comprehensive guide:
1. Gather the Necessary Tools and Battery
Before you begin, ensure you have the following:
- New Battery: Most Toyota key fobs use a CR2032 battery. However, it’s always best to double-check your owner’s manual or the old battery itself to confirm the correct type. Having the right battery on hand will make the process seamless.
- Small Flathead Screwdriver or Key Blade: You’ll need a small flathead screwdriver or the mechanical key blade that’s hidden inside your key fob to open the casing. A plastic trim tool can also be helpful to avoid scratching the fob.
- Soft Cloth (Optional): Using a soft cloth can protect the key fob casing from scratches during the opening process.
2. Remove the Emergency Key
Locate the small release button on your Toyota key fob. This button is usually a small metal or plastic catch. Press and hold this button to release the mechanical emergency key. Slide the key out and set it aside in a safe place. This key will be useful for opening the fob casing and as a backup to unlock your car manually if needed.
3. Open the Key Fob Casing
The method to open your Toyota key fob varies slightly depending on the model year of your Toyota.
- For Newer Toyota Models: Look for a small slot or notch on the key fob casing, usually where the emergency key was located or along the side seam. Insert the end of your mechanical key blade or a small flathead screwdriver into this slot. Gently twist or pry to separate the two halves of the key fob casing.
- For Older Toyota Models: Older models might not have a dedicated slot. In this case, carefully examine the seam running around the key fob. Use a small flathead screwdriver or plastic trim tool to gently pry along this seam to separate the top and bottom halves of the casing. Work your way around the seam slowly and carefully to avoid damaging the plastic.
4. Access the Battery Compartment
Once the key fob is open, you’ll typically see a circuit board and the battery compartment. In some models, the battery might be directly visible. In others, you may need to gently lift or remove a plastic cover or the circuit board to access the battery.
Important: Handle the internal components with care. Avoid touching the circuit board components directly if possible to prevent static discharge damage.
5. Identify and Remove the Old Battery
Note the orientation of the old battery before removing it. Usually, the positive (+) side of the battery faces upwards. Take a picture with your phone if needed for reference during reassembly. Gently pry the old battery out of its compartment. You can use your fingernail or the tip of a small screwdriver to carefully lift it out.
6. Install the New Battery
Take your new CR2032 battery (or the correct type for your fob). Install the new battery into the compartment, ensuring the correct polarity (positive side up, matching the orientation of the old battery). You should feel it snap or fit snugly into place.
7. Reassemble the Key Fob
Carefully align the two halves of the key fob casing. Press them firmly together until they snap back into place. Ensure there are no gaps and the casing is securely closed.
8. Test Your Toyota Key Fob
After reassembling the fob, test its functionality immediately. Press the lock, unlock, and trunk buttons to ensure they are working correctly. Try starting your car with the key fob as well, if your model has push-button start. If everything works as expected, congratulations! You’ve successfully completed your Toyota key fob battery change.
If the key fob is still not working, double-check the battery orientation, ensure the battery is correctly seated, and re-examine the fob components for any damage during the process.
Recognizing the Signs of a Dying Key Fob Battery
Being proactive and recognizing the warning signs of a low key fob battery can prevent you from being caught off guard. Here are common indicators that your Toyota key fob battery is nearing the end of its life:
- Decreased Range: You need to be closer to your Toyota than usual for the key fob to lock or unlock the doors. Modern key fobs typically have a range of around 50 feet. A significant reduction in this range suggests a weakening battery.
- Dim or No LED Indicator Light: Most key fobs have a small LED light that illuminates when you press a button. If this light is dim, weak, or doesn’t light up at all, it’s a strong indication of a low battery.
- Intermittent or Sluggish Response: You press a button, but the car doesn’t respond immediately, or you need to press the buttons multiple times for the command to register. This delay or unresponsiveness can point to a battery issue.
- Dashboard Warning Light: Some newer Toyota models have a dashboard warning light or message that specifically indicates a low key fob battery. Refer to your owner’s manual to see if your vehicle has this feature.
What If Changing the Battery Doesn’t Solve the Problem?
If you have followed all the steps for changing the battery in your Toyota key fob and it is still not functioning, there could be other issues.
- Key Fob Damage: Inspect the key fob for any signs of physical damage, such as cracks, water damage, or damaged internal components. If the fob is visibly damaged, it might need to be replaced.
- Key Fob Programming: In rare cases, after a battery change, the key fob might need to be reprogrammed to your vehicle. This is less common with simple battery changes but can occur.
- Vehicle Receiver Issues: Although less likely, there could be an issue with the receiver in your Toyota that communicates with the key fob.
If you suspect any of these issues, or if you prefer professional assistance, contact your local Toyota dealership or a qualified automotive locksmith. For Toyota owners in the El Monte, California area, Longo Toyota offers genuine OEM Toyota key fobs and expert programming services. Their service center can diagnose and resolve any key fob or vehicle access issues you may be experiencing. Don’t hesitate to reach out to them for help!
This guide from keyfobprog.com aims to empower you with the knowledge to handle a Toyota key fob battery change yourself. By being prepared and understanding the process, you can confidently maintain your key fob and avoid potential inconveniences.