Coolant, often known as antifreeze, is the lifeblood of your engine’s temperature regulation system. Without the correct amount and proper circulation of this fluid, your engine is at serious risk of overheating and significant damage. Therefore, regularly checking your coolant levels is not just good practice—it’s essential for engine longevity. If you find yourself frequently topping off your coolant, it’s a strong indication that you may have a Coolant Leak In Engine, signaling a problem that needs immediate attention.
Common Causes of Coolant Leaks in Your Engine
Pinpointing the source of a coolant leak is the first step towards effective repair. Leaks can originate from various components within your engine’s cooling system. Here are some of the most common culprits:
1. Blown Head Gasket
Your engine’s head gasket is a critical seal positioned between the cylinder head and the engine block. Its job is to keep coolant and engine oil separate and contained within their respective pathways. When a head gasket blows, this seal is compromised. This can lead to coolant mixing with engine oil, or, critically, coolant leaking externally from the engine block. A blown head gasket is a serious issue that can lead to significant engine damage if not addressed promptly.
2. Damaged Heater Core
The heater core functions like a miniature radiator, responsible for providing heat to your vehicle’s cabin. Located within the dashboard, the heater core circulates hot coolant. If the heater core develops a leak, coolant can accumulate within its housing, often made of plastic. While hidden from direct view, a leaking heater core can be detected by a sweet smell inside the car or dampness on the passenger side floor.
3. Cracked or Damaged Hoses
Coolant travels through a network of hoses throughout your engine bay, connecting various cooling system components. These hoses are subjected to high temperatures and pressure, and over time, they can become brittle, crack, or develop holes. A crack in a coolant hose is a common cause of external coolant leaks, often visible as drips or puddles under the vehicle.
4. Loose or Worn Hose Connections
Wherever a coolant hose connects to another component, such as the radiator, engine block, or thermostat housing, there’s a potential leak point. These connections are often secured with hose clamps, which can loosen over time due to engine vibrations and temperature fluctuations. Worn or loose hose connections are frequent sources of slow, persistent coolant leaks.
5. Broken Radiator
The radiator is the primary component responsible for cooling the engine coolant. Despite modern coolants containing anti-corrosion additives, radiators can still develop leaks, especially as vehicles age or due to physical damage from road debris. Radiator leaks are often noticeable at the front of the vehicle, near the radiator itself.
Recognizing the Signs of a Coolant Leak in Your Engine
Early detection of a coolant leak is crucial to prevent engine overheating and costly repairs. Being alert to the warning signs can save you from significant engine damage.
Early Warning Signs are Crucial
Identifying a coolant leak in its early stages can make a big difference. Here are common symptoms to watch out for:
- Puddles of Colored Fluid: One of the most obvious signs is seeing puddles of coolant under your car, typically green, orange, pink, or blue, especially after the vehicle has been parked. This indicates an external coolant leak.
- Sweet, Antifreeze Smell: A sweet odor, noticeable inside the car or around the engine bay, often indicates evaporating coolant. This smell is a strong indicator of a coolant leak, as coolant has a distinct sweet scent.
- Engine Overheating: A significant symptom of a coolant leak is engine overheating. Watch your temperature gauge; if it rises higher than normal or enters the red zone, especially during normal driving, it suggests a cooling system problem, very often a coolant leak. Steam emanating from under the hood is another critical sign of overheating due to coolant loss.
- Consistently Low Coolant Level: Regularly monitor your coolant reservoir. If you notice the coolant level is consistently dropping, requiring frequent top-offs, it’s highly likely you have a leak somewhere in the system. A low coolant warning light on your dashboard will also signal this issue.
- Bubbles in the Coolant Reservoir: Bubbles visible in the coolant reservoir can indicate combustion gases leaking into the cooling system. This is a serious sign, often associated with a head gasket leak, and requires immediate professional attention.
- Fluctuating Temperature Gauge: An erratic temperature gauge that moves up and down more than usual can be another symptom of a coolant leak affecting the engine’s cooling efficiency.
Regular Checks to Prevent Major Issues
Proactive maintenance can help catch potential leaks before they escalate. Regularly inspect coolant hoses and radiator connections for:
- Cracks or Bulges: Visually examine hoses for any signs of cracking, swelling, or softening, which indicate weakening material prone to leaks.
- Wet Spots or Residue: Look for damp areas around hoses, connections, the radiator, and engine block. Dried coolant often leaves a crusty, colored residue at leak points.
- Corrosion: Check for corrosion around hose clamps, radiator seams, and other cooling system components, as corrosion can weaken these parts and lead to leaks.
If you observe any of these signs, take immediate action. Top off your coolant reservoir with the correct type of coolant and investigate further to pinpoint and address the source of the leak. Ignoring these early signs can lead to severe engine damage.
How to Find a Coolant Leak in Your Engine
Locating a coolant leak can sometimes be straightforward, especially if it’s a visible external leak. However, some leaks can be more elusive.
Visual Inspection
Start with a thorough visual inspection:
- Check for Puddles: Look under your vehicle, especially after it’s been parked overnight. Note the color and location of any puddles to help trace the leak’s origin.
- Examine the Coolant Reservoir: With the engine cool, check the coolant reservoir for bubbles while the engine is running. Bubbles can suggest a head gasket leak or air entering the system due to a leak.
- Inspect Hoses and Connections: Carefully examine all coolant hoses, paying close attention to connections and clamps. Look for wetness, cracks, or residue.
- Radiator Inspection: Check the radiator core and seams for signs of leakage or damage.
Caution: Never open the radiator cap or coolant reservoir cap when the engine is hot. The cooling system is pressurized, and hot coolant can spray out, causing severe burns. Always ensure the engine is completely cool before inspecting the cooling system closely.
Coolant Pressure Test: A Step-by-Step Guide
If a visual inspection doesn’t reveal the leak, a coolant pressure test is a valuable diagnostic procedure. This test pressurizes the cooling system to help expose leaks that might not be apparent under normal operating pressure.
Step 1: Ensure the Engine is Cool
Wait until the engine is completely cool before starting the pressure test. Working on a hot cooling system is dangerous and can cause injury.
Step 2: Carefully Remove the Radiator Cap
Slowly remove the radiator cap or reservoir cap to release any residual pressure from the cooling system.
Step 3: Attach the Pressure Tester
Attach the coolant pressure tester to the radiator neck or coolant reservoir, ensuring a secure and airtight seal.
Step 4: Pressurize the System
Pump the pressure tester to pressurize the cooling system to the pressure specified by your vehicle’s manufacturer (typically between 15 and 20 psi). Refer to your vehicle’s repair manual for the correct pressure specification.
Step 5: Monitor for Pressure Drop and Check for Leaks
Watch the pressure gauge on the tester. A drop in pressure indicates a leak in the system. While the system is pressurized, carefully inspect all hoses, hose connections, the radiator, water pump, engine block, and heater core for visible coolant leaks or drips.
Step 6: Release Pressure and Disconnect
Once you have completed the test, carefully release the pressure from the system using the pressure tester’s release valve before disconnecting the tester.
If the pressure test reveals a leak, you can now focus on repairing the specific component identified as the source.
Fixing Coolant Leaks in Your Engine
The most effective way to fix a coolant leak is to identify the source and replace or repair the faulty component.
Permanent vs. Temporary Fixes
-
Permanent Repairs: For lasting solutions, replace damaged parts. This might include:
- Hose Replacement: Replace cracked, bulging, or deteriorated hoses with new, high-quality hoses designed for coolant systems.
- Radiator Cap Replacement: A faulty radiator cap can cause pressure issues and leaks. Replace it with a new cap that matches your vehicle’s specifications.
- Reservoir Tank Replacement: If the coolant reservoir itself is cracked or leaking, replace it with a new one.
- Component Gaskets/Seals: For leaks from connections or components like the water pump or thermostat housing, replacing gaskets or seals is often necessary.
-
Temporary Solutions (For Minor Leaks in Emergencies): For very minor leaks, and as a temporary measure to get you to a repair shop, you might consider:
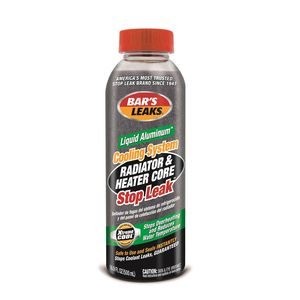
- Radiator Sealants: Radiator sealant additives can be added to the coolant system to temporarily seal small leaks in the radiator, heater core, or head gasket. These products work by circulating in the coolant and forming a seal at the leak point. Important: These are temporary fixes and not a substitute for proper repair.
- Hose Repair Tape or Clamps: For small hose leaks, specialized hose repair tape or a hose clamp and rubber patch can provide a temporary seal.
Caution: Temporary fixes are not long-term solutions and should always be followed up with a proper diagnosis and repair by a qualified mechanic to prevent further damage and ensure safe vehicle operation.
Addressing Serious Leaks (Head Gasket)
A blown head gasket is a serious issue that requires professional attention.
- Head Gasket Replacement: The most reliable long-term fix for a blown head gasket is to replace the head gasket. This is a labor-intensive job that typically involves removing the cylinder head, replacing the gasket, and reassembling the engine.
- Sealants for Minor Head Gasket Leaks (Use with Caution): In cases of very minor head gasket leaks, some specialized head gasket sealant products may offer a temporary solution. However, these should be used with extreme caution and with the understanding that they are not a permanent fix and may not work in all situations. Consulting a mechanic is highly recommended before using sealant for head gasket issues.
Preventative Maintenance to Avoid Engine Coolant Leaks
Preventing coolant leaks through regular maintenance is far more cost-effective than dealing with the consequences of engine damage.
Key Maintenance Steps:
- Regularly Check Coolant Level: At least monthly, and ideally every time you check your oil, inspect the coolant level in the reservoir. Top off with the correct coolant mixture if needed.
- Inspect Hoses and Belts: Regularly examine all coolant hoses and drive belts for cracks, bulges, wear, or fraying. Replace any damaged components promptly.
- Coolant Flush and Replacement: Follow your vehicle manufacturer’s recommended service intervals for flushing and replacing your coolant. Typically, this is every two to five years or as specified in your owner’s manual. Flushing removes old coolant, corrosion, and debris, and replacing it with fresh coolant helps maintain the cooling system’s efficiency and prevents corrosion-related leaks.
- Clean Radiator Fins: Periodically inspect the front of your radiator and grille and remove any debris like dirt, bugs, leaves, or other obstructions that can restrict airflow and lead to overheating and potential leaks.
- Check Radiator Cap Condition: Ensure your radiator cap is in good condition and properly seals the system. A faulty cap can lead to pressure loss and coolant leaks. Replace the cap if it shows signs of damage or wear.
By adhering to these preventative maintenance steps, you can significantly reduce the likelihood of coolant leaks and ensure your engine’s cooling system remains in optimal condition, prolonging the life of your engine.
In Conclusion:
Dealing with a coolant leak in your engine is not something to postpone. Coolant leaks, even seemingly minor ones, can quickly escalate into serious engine problems if ignored. Early detection, proper diagnosis, and timely repair are key to preventing overheating and costly engine damage. By understanding the causes, recognizing the symptoms, and performing regular maintenance, you can keep your engine running cool and reliably for years to come. If you’re unsure about diagnosing or repairing a coolant leak, always seek the help of a qualified automotive technician.
FAQs
-
How can I tell if my vehicle has a coolant leak?
You can identify a coolant leak by observing symptoms like low coolant levels, colored puddles under your car, a sweet smell, engine overheating, or a low coolant warning light.
-
Can I drive my car if it’s leaking coolant?
Driving with a coolant leak is not recommended and can be dangerous for your engine. It can quickly lead to overheating and severe engine damage. It’s best to address the leak before driving.
-
How do I find a hidden coolant leak?
To find a hidden coolant leak, perform a coolant pressure test. Also, carefully inspect for subtle signs like dried coolant residue, steam, or small drips around the engine and hoses in good lighting.
-
Can I temporarily fix a coolant leak?
Yes, you can use radiator sealants or hose repair tape as temporary fixes for minor leaks to get you to a repair shop. However, these are not permanent solutions and require follow-up with a proper repair.
-
What’s the cost of fixing a coolant leak?
The cost to fix a coolant leak varies widely depending on the location and severity of the leak. Minor repairs like hose replacement might cost around $100-$300, while major repairs like head gasket replacement can exceed $1,000 or more.