Is your car taking ages to heat up in cold weather? You’re not alone. Many car owners experience delayed heating, which can be frustrating and uncomfortable. Before you jump to expensive solutions like heater core replacement or a full coolant system flush, consider a simpler fix: replacing the Coolant Shut Off Valve. This DIY guide, tailored for car enthusiasts and home mechanics, will walk you through the process of replacing this valve, potentially restoring your car’s heating system to its optimal performance. This repair is often overlooked, but it can be a cost-effective and straightforward solution to slow cabin heat issues, especially in Volkswagen and Audi vehicles.
Before we begin, it’s important to understand that this guide is based on personal experience and is intended for informational purposes. Always consult your vehicle’s service manual and take necessary safety precautions when working on your car.
To tackle this DIY job, you’ll need a few common tools:
- Torx Bits (T25 and T30): Essential for removing various components in your car’s engine bay.
- 7mm Socket: For loosening hose clamps in tight spaces.
- Radiator Hose Pick: Helpful for disconnecting coolant hoses.
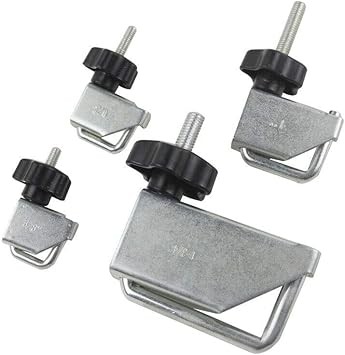
- Coolant Hose Clamps: Crucial for preventing coolant loss during the valve replacement. Consider a set like the VCT 4 Pc Fluid Line Clamp Set, available on Amazon for convenience:
Alt text: VCT Fluid Line Clamp Set for pinching off coolant hoses during car repairs.
For added convenience, especially when dealing with hose clamps, ratcheting hose clamp pliers can be a game-changer. Tools like the Astro Pneumatic Tool 9409A Hose Clamp Pliers, also found on Amazon, can significantly simplify the process:
Alt text: Astro Pneumatic Hose Clamp Pliers tool, making hose clamp removal easier during auto maintenance.
A ratchet quick spinner, such as the Williams 30003 1/4-Inch Drive Socket Extension, available on Amazon, can also be beneficial for working in confined engine compartments, providing better access to bolts and fasteners:
Alt text: Williams 1/4-Inch Drive Socket Extension, a tool for quick tightening and loosening in auto repair.
The replacement part you’ll need is the coolant shut off valve. For models like a 2017 VW Golf R, the part number 4H0121671D from FCP Euro is a suitable replacement. However, always verify the correct part number for your specific car model and year to ensure compatibility. You can find this part at FCP Euro:
Audi HVAC Heater Control Valve – Genuine VW Audi 4H0121671D
Now, let’s get to the step-by-step replacement process:
Step-by-Step Coolant Shut Off Valve Replacement Guide
-
Air Filter Housing Removal: The first step is to remove the air filter housing to gain access to the coolant shut off valve. This valve is typically located on the driver’s side of the engine block. Consult your car’s repair manual or online videos for specific instructions on removing your air filter housing, as procedures can vary slightly between models. It’s usually a straightforward process involving loosening clamps and hoses and then lifting the housing out.
-
Accessing the Coolant Shut Off Valve: Once the air filter housing is out of the way, you’ll need to remove the air guide pipe. Locate the T30 Torx bolt securing the air guide pipe and remove it. Also, loosen the rearward hose clamp on the pipe using a 7mm socket. Access to this clamp can be tight, so using a socket wrench is often easier than a screwdriver. With these loosened, the pipe will be movable, providing better access to the coolant shut off valve situated beneath it.
View attachment 146610
View attachment 146611
Alt text: Two images showing the location of the coolant shut off valve and surrounding components in a car engine bay.
-
Valve Removal and Replacement: Begin by disconnecting the electrical connector from the coolant shut off valve. A small pick can be helpful to gently pull back the tab and release the connector. Next, remove the two T30 bolts that secure the valve to the engine block. Removing the valve before the hoses can provide more maneuverability to access the hose clamps. Alternatively, some might find it easier to remove the hoses first.
-
Hose Clamp and Hose Removal: Now, use your fluid line clamps to carefully clamp off the coolant hoses connected to the shut off valve. Important: Avoid clamping too close to the valve fitting, as this will restrict space for removing the hoses and reattaching them to the new valve. If you choose not to use clamps, be prepared for coolant spillage. Using hose clamp pliers, remove the hose clamps and then carefully detach the hoses from the valve using a radiator hose pick to gently break the seal. Access can be challenging due to the tight space, so patience and maneuvering are key.
View attachment 146612
Alt text: Close-up view highlighting the two hose clamps that need to be removed from the coolant shut off valve during replacement.
-
Reassembly and Coolant Top-off: Installation is essentially the reverse of removal. The trickiest part is often reattaching the hoses and hose clamps in the confined space. Ensure the new coolant shut off valve is securely bolted in place and the electrical connector is firmly reattached. Once everything is reconnected, remove the fluid line clamps.
-
Testing: Start the engine and let it run for a short period (around 30 seconds). Then, check your coolant level and top it off as needed. Monitor for leaks and, most importantly, check if your car’s heating system now works more quickly.
With the coolant shut off valve replaced, you should experience a significant improvement in how quickly your car’s heater starts working. While this DIY fix has shown promise, always monitor your car’s performance and consult a professional mechanic if issues persist. Replacing the coolant shut off valve is a proactive step that can save you time and money compared to more extensive cooling system repairs.