PS – For your convenience, a printable PDF version of this tutorial, condensed into six beautifully formatted pages, is available for download here.
Here’s what you will need to create your own fabric key fobs:
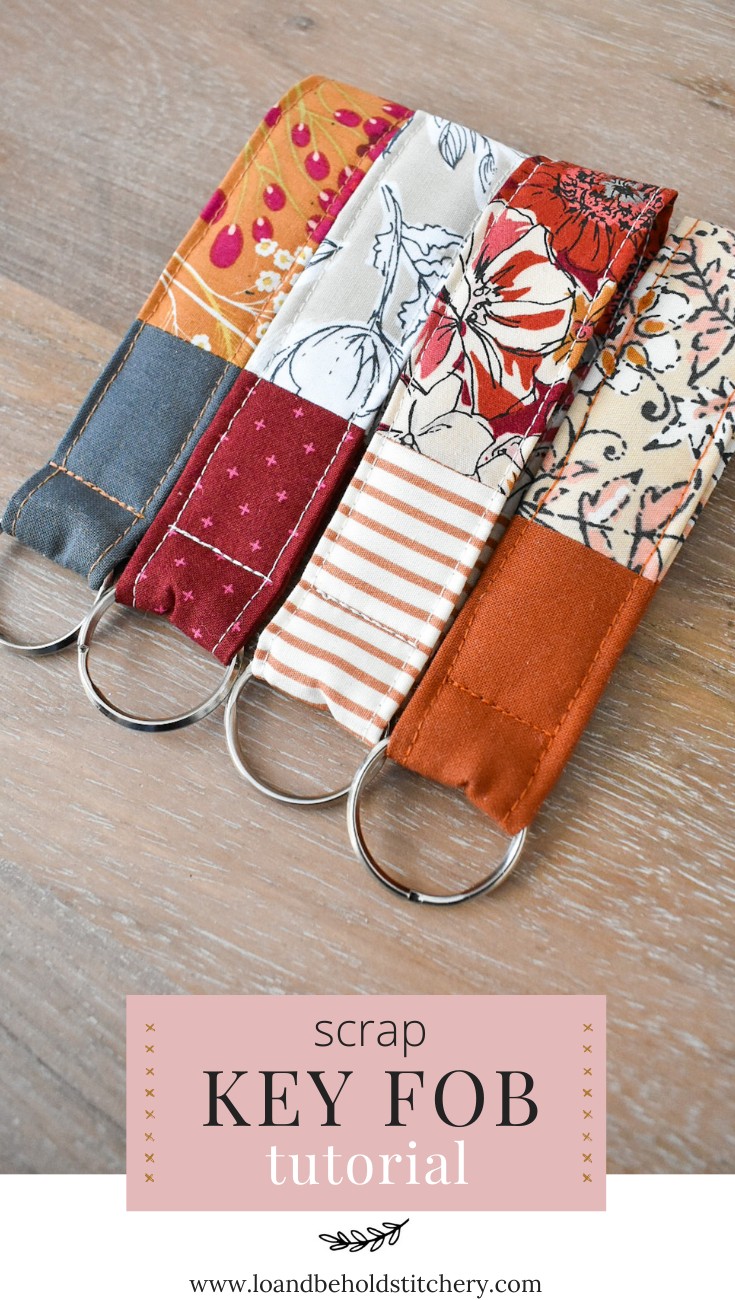
Sewing Instructions
- Prepare the Fabric Pieces: Begin by sewing the two fabric pieces together along their shorter ends. Once sewn, press the seam open to ensure a flat and neat finish.
- Fold Fabric Lengthwise: Fold the joined fabric piece in half lengthwise, with the wrong sides facing each other. Press along the fold to create a sharp crease.
- Insert Batting: Place the batting piece inside the folded fabric, aligning it against the crease. Center the batting, leaving approximately 1/4″ of fabric overhang on both ends.
- Fold Bottom Edge: Fold the bottom edge of the fabric up and around the batting. Press this folded edge to create another crease, securing the batting within the fabric.
- Fold Top Edge: Fold the top edge of the fabric down about 1/4″ over the batting. Press this fold to create a clean, finished edge.
- Attach Key Ring and Secure Fabric: Insert the fabric strip into the key ring. Use clips to hold the folded fabric edges together, ensuring they are securely aligned around the key ring.
- Fold Key Fob in Half: Fold the key fob in half, bringing the two raw ends together and aligning them evenly.
- Align and Pin Raw Ends: Slightly unfold the raw ends to ensure the entire 3″ of fabric is aligned. Move the batting aside to avoid stitching over it. Pin the layers in place to secure them for sewing.
- Sew the Loop: Sew a 1/4″ seam across the raw ends. This seam will create a closed loop for your fabric key fob.
- Press Seam Open: Use your fingers to gently press the newly sewn seam open, reducing bulk and ensuring a flatter finish.
- Reposition Batting: Return the batting pieces to their original position within the fabric fold, ensuring they are properly placed within the key fob loop.
- Trim Batting if Necessary: If the batting pieces overlap at the seam, trim them so they butt against each other without overlapping, ensuring a smooth layer.
- Refold and Clip Fabric: Fold the fabric back over the batting as it was originally, encasing the batting within the fabric folds. Use clips to hold the folded edges in place.
- Prepare to Stitch Edges: Bring both the bobbin thread and needle thread above the needle plate, pulling out about 5″ of each. This extra thread is needed for knotting later. Start stitching about 1/8″ from the edge around the loop, moving the hardware and clips as you sew.
-
Bury Threads for a Clean Finish: Instead of backstitching on visible seams, bury the threads for a cleaner look. Stop sewing with the needle down about 2-3 inches before your starting point. Gently pull one thread to bring the other to the same side. Tie both threads in a knot.
-
Hide Thread Knot: Thread a needle close to the knot and bring it out 1-2 inches away, going through only the top layers of the fabric key fob.
- Trim Thread Tails: Gently pull the thread to “pop” the knot underneath the fabric. Trim the excess thread tails for an invisible finish.
-
Complete First Edge Stitching: Continue stitching until you reach the beginning of your seam, completing the stitching around one edge of the loop. Bury these threads as well, using steps 15-17.
-
Repeat for Second Edge: Repeat steps 14-18 for the opposite edge of the key fob, ensuring both long edges are neatly stitched.
- Attach Hardware: Arrange the key fob hardware in the middle of the accent fabric section of the key fob. Clip the fabric around the hardware, positioning it for the final stitch.
- Final Stitch Across Width: Starting with about 5″ of bobbin and needle thread, stitch across the width of the key fob to secure the hardware. Stitch forward, backward, then forward again for extra security. Bury the thread tails as previously described in steps 15-17.
- Enjoy Your Fabric Key Fob!
Fair warning: making fabric key fobs can become quite addictive! They are perfect for using up scrap fabrics and creating personalized accessories or thoughtful gifts.
Download the printable PDF for this tutorial here.
Happy Sewing!