Your vehicle relies on a symphony of sensors to operate efficiently, and the camshaft position sensor is a key player in this performance. If this sensor malfunctions, it can seriously impact your engine’s performance and your driving experience. Replacing a faulty camshaft position sensor is crucial, but it’s not the end of the process. To ensure your engine runs smoothly and optimally, you’ll likely need to calibrate or reset the new sensor.
Let’s delve into the process of how to calibrate a camshaft position sensor, providing you with a step-by-step guide to keep your engine running in top condition and addressing common questions along the way.
Step-by-Step Guide: How to Relearn Your Camshaft Position Sensor
Important Note: The term “resetting” or “calibrating” a camshaft position sensor typically refers to the relearning process required after installing a new sensor. A sensor that is already failing cannot be repaired by simply resetting it. If you’re uncertain about working with automotive components, it’s always recommended to consult a professional mechanic.
However, if you want to understand the general procedure, here are the steps for replacing and then relearning the camshaft position sensor:
1. Pinpointing the Camshaft Position Sensor Location
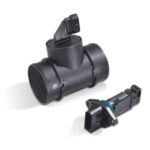
The camshaft position sensor is generally a compact component, often shaped like a disc or tube, equipped with wire connections secured by a couple of bolts. You can typically find this sensor in these locations:
- In close proximity to the camshaft itself
- Situated near the cylinder head
- Positioned behind the timing cover, which protects the timing belt or timing chain
- Integrated with the timing belt or timing chain mechanism
- At the front or rear of the engine block
Note: Keep in mind that the camshaft position sensor’s exact location can vary depending on whether it’s on the driver’s side or passenger side of the engine, and is heavily dependent on your specific vehicle’s make and model. Consulting your vehicle’s owner’s manual is always a good idea if you’re unsure of its precise location.
Alt text: Technician disconnecting camshaft position sensor wiring harness in engine bay for sensor replacement.
2. Removing the Old Camshaft Sensor
Using a 10mm socket wrench, carefully loosen the bolts that secure the camshaft sensor in its position. You might need to move aside any obstructing tubes or wiring to gain clear access.
Next, disconnect the wiring connector that attaches the sensor to the engine’s electrical system.
As you remove the old position sensor, carefully inspect the wiring and the connector for any signs of damage like corrosion or fraying. Damaged wiring or connectors might also need replacement to ensure proper sensor function.
3. Installing the New Camshaft Sensor Correctly
Before installing the new sensor, it’s vital to verify that it’s the correct replacement part for your vehicle. The best way to ensure a match is to take the old sensor with you to an auto parts store and request an exact replacement. However, avoid driving the vehicle from which you removed the sensor if it’s already experiencing issues.
If an exact match isn’t available, ensure the new sensor is at least compatible with your engine type and vehicle specifications.
Once you have the correct new sensor, proceed with installation:
- Connect the wiring connector securely to the new sensor.
- Use the socket wrench to carefully position the sensor in place and tighten the bolts. Be careful not to overtighten the bolts, as this could crack the sensor’s plastic housing. Tighten until you feel slight resistance.
Alt text: Automotive technician installing a new camshaft position sensor onto a car engine, securing it with bolts near the cylinder head.
4. Relearning the New Camshaft Sensor: Calibration Methods
There are primarily two methods to reset or relearn the camshaft position sensor after replacement:
- Utilizing a professional scan tool equipped with specialized diagnostic software.
- Performing a specific driving procedure, if applicable to your vehicle.
Let’s examine each camshaft position sensor relearn method in detail:
A. Camshaft Sensor Relearn Using a Scan Tool
While some modern vehicle engines are designed to automatically relearn a new sensor over time, many vehicles require a more direct approach using an advanced OBD II scanner. This reset process is often referred to as CASE (Crank Angle Sensor Error) relearn or “Cam Crank Relearn.”
The diagnostic software within the scan tool recalibrates the crucial positional relationship between the camshaft position sensor and the crankshaft position sensor (CKP sensor). This synchronization is vital for accurate engine timing.
Here are the general steps for using a scan tool for camshaft sensor relearn:
- Connect the scan tool to the OBD II diagnostic connector, typically located under your vehicle’s steering wheel.
- Turn the ignition key to the “ON” position, but do not start the engine.
- Navigate the scan tool’s menu to find the “Special Functions” or similar section, and then select the “CASE Relearn” or “Cam Crank Relearn” option.
- The scan tool will typically prompt you to start the engine to initiate the reset procedure.
- Start the engine as instructed. The scan tool will communicate with the engine control unit (ECU) and display a confirmation message once it has successfully reset the positional relationship between the camshaft sensor and the crankshaft sensor.
B. Camshaft Sensor Relearn Procedure Without a Scan Tool
In some cases, a camshaft position sensor relearn can be performed without a scan tool using a specific driving pattern. This method relies on the vehicle’s computer to learn the new sensor parameters through a set driving cycle. This procedure is not universally applicable and depends on your vehicle’s make and model. Consult your vehicle’s repair manual or reliable online resources specific to your car to confirm if this method is suitable.
If applicable, a general procedure often involves the following steps:
- Ensure all electrical accessories are turned off (headlights, radio, AC, etc.) to minimize electrical load.
- Verify that the intake air temperature and engine coolant temperature are within 9°F (5°C) of each other. This ensures the engine is at a stable operating temperature.
- Allow the engine to idle in park or neutral for 2 minutes.
- Accelerate smoothly to 55 mph (88 km/h) at part throttle (lightly pressing the accelerator pedal).
- Maintain a steady speed of 55 mph for 10 minutes.
- Decelerate gradually to 45 mph (72 km/h) without applying the brakes, and maintain this speed for 1 minute.
- Repeat the deceleration cycle four times, each cycle lasting 25 seconds, returning to 45 mph for 15 seconds between each deceleration.
- Accelerate back to 55 mph and maintain this speed for 2 minutes.
- Come to a complete stop and allow the engine to idle for 2 minutes with the brakes applied while in Drive (for automatic transmissions) or Neutral (for manual transmissions).
Note: It’s important to be aware that this same driving procedure might also be used to relearn a new crankshaft position sensor (crankshaft sensor).
How can you confirm if the relearn procedure was successful? The most common indicator of a successful relearn procedure is if the “Check Engine Light” turns off after completing the process. However, it’s always advisable to use a scan tool to verify that no related diagnostic trouble codes (DTCs) are present.
When is it necessary to reset the camshaft position sensor? Let’s explore the symptoms of a faulty camshaft sensor to understand when replacement and relearning become necessary.
Identifying a Faulty Camshaft Sensor: Key Symptoms
Here are common symptoms that indicate a potential problem with your camshaft position sensor:
1. Check Engine Light or Service Engine Soon Light Illumination
A failing camshaft or crankshaft position sensor can disrupt the precise timing of fuel injection and ignition. This disruption often triggers the Check Engine Light (CEL) or Service Engine Soon light (SES light) on your dashboard.
However, because the engine light can be activated by various issues, it’s essential to retrieve the specific diagnostic trouble code (DTC) to pinpoint the root cause. A faulty camshaft sensor will often generate a P0340 or P0016 fault code, accompanied by the illuminated engine light.
Alt text: Illuminated check engine light on a car dashboard, signaling potential engine or emissions issues.
2. Difficulty Starting the Vehicle
The camshaft position sensor, working in conjunction with the crankshaft position sensor, plays a crucial role in controlling fuel injection and ignition timing during engine start-up. If these sensors malfunction, you may experience difficulty starting your vehicle. If a failing sensor is not addressed promptly, it can eventually lead to a complete no-start condition.
3. Engine Performance Issues: Sputtering and Stalling
Beyond start-up problems, a malfunctioning camshaft sensor can negatively impact engine performance while driving. As the sensor degrades, you might notice increased engine sputtering, hesitation or lags during acceleration when you press the gas pedal, and even unexpected engine stalling at idle or while driving.
4. Reduced Fuel Efficiency
Incorrect ignition timing caused by a faulty camshaft sensor can lead to incomplete combustion and misfires within the engine’s combustion chambers. This inefficient combustion forces the engine to work harder and consume more fuel to produce the same level of power.
This excess fuel consumption can also be detected by the oxygen (O2) sensors in the exhaust system, potentially causing the check engine light to flash, indicating a more severe misfire condition.
5. Transmission Problems
In some vehicles, the camshaft position sensor data is also used by the transmission control system. A faulty sensor sending incorrect data to the Powertrain Control Module (PCM) can lead to transmission issues. You might experience erratic or inconsistent shifting, or in more severe cases, the transmission could enter a “limp mode” or even lock up, preventing gear changes altogether.
Is it safe to drive with a faulty camshaft position sensor? Let’s consider the implications.
Driving with a Faulty Camshaft Position Sensor: Is it Advisable?
While it might be technically possible to drive short distances with a failing camshaft position sensor, it’s generally not recommended, especially for extended periods or long drives. Continuing to drive with a faulty sensor can potentially cause further engine damage over time.
The camshaft position sensor is essential for the engine’s proper and efficient operation. Driving with a malfunctioning sensor can result in decreased fuel economy, increased engine misfires, and elevated emissions levels. In some cases, it can even lead to catalytic converter damage due to prolonged misfires.
If you suspect a failing camshaft position sensor, it’s best to address the issue promptly and seek professional diagnosis and repair to prevent potential long-term engine problems.
Frequently Asked Questions About Camshaft Position Sensors
Here are answers to some common questions regarding camshaft position sensors:
1. What Causes a Camshaft Position Sensor to Fail?
Camshaft and crankshaft position sensors can fail due to a variety of factors, including:
- Normal wear and tear: Like any mechanical or electronic component, sensors can degrade over time with use and exposure to engine heat and vibrations.
- Engine overheating: Excessive engine heat can damage the sensor’s internal components and wiring.
- Corrosion: Exposure to moisture and road salts can cause corrosion of the sensor’s metal elements and electrical connectors.
- Engine oil leaks: Oil leaks near the sensor can contaminate the sensor and its electrical connections, leading to malfunction.
- Electrical shorts or wiring damage: Damage to the sensor’s wiring harness or internal short circuits can disrupt sensor signals.
2. Why Won’t My Car Start After Replacing the Camshaft Sensor?
If your car fails to start after camshaft sensor replacement, consider these possibilities:
- Incorrect sensor installation: Ensure the new sensor is properly seated and securely bolted in place.
- Incomplete relearn procedure: The PCM might still require the relearn procedure to correctly recognize the new sensor.
- Wiring harness damage: Check for any damage to the wiring harness or connector that may have occurred during installation, preventing proper electrical connection and power supply to the sensor.
- Faulty aftermarket sensor: In rare cases, a newly installed aftermarket sensor might be defective.
- Sensor incompatibility: Verify that the replacement sensor is indeed the correct part for your vehicle’s make, model, and engine.
- Crankshaft sensor synchronization issue: If the crankshaft position sensor is also faulty or not properly synchronized with the new camshaft sensor, it can prevent starting.
3. What is the Average Cost to Replace a Camshaft Sensor?
The cost to replace a camshaft position sensor typically ranges from $100 to $400, depending on your vehicle’s make and model and labor rates in your area. The sensor itself is relatively inexpensive, often costing between $20 and $100. The labor time is usually around one to two hours, but it can be longer and more expensive if there is additional damage or accessibility issues around the sensor location.
Maintain Engine Synchronization with Professional Service
A well-synchronized and smoothly running engine is fundamental to your vehicle’s longevity and performance. Proper camshaft position sensor calibration after replacement is a vital step in maintaining your vehicle’s optimal operation.
For expert camshaft sensor replacement and relearn services, consider seeking assistance from qualified professionals. Whether you require camshaft sensor service, crankshaft sensor replacement, or other engine maintenance, reliable mobile mechanics can provide convenient service at your location. Contact a trusted mobile mechanic service for a quote and ensure your engine stays in perfect sync.