The engine coolant temperature sensor (ECT) is a critical component in your vehicle’s engine management system. It measures the temperature of the engine coolant and sends this information to the car’s computer (ECU). This data is crucial for adjusting fuel injection and ignition timing, ensuring optimal engine performance and preventing overheating. If you suspect issues with your engine’s performance or temperature readings, checking the coolant temperature sensor is a vital diagnostic step. This guide will explain how to check your coolant temperature sensor effectively using different methods.
Understanding the Engine Coolant Temperature Sensor (ECT)
The ECT sensor is essentially a temperature-sensitive resistor, often a thermistor with a negative temperature coefficient (NTC). This means its resistance decreases as the temperature increases. Typically, it’s a two-wire sensor submerged in the engine coolant to accurately gauge its temperature. The ECU uses this signal as a primary input to fine-tune ignition timing and fuel injection duration for efficient engine operation.
/ECT.gif)
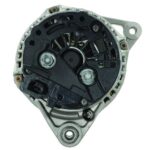
Fig. 1: A typical engine coolant temperature sensor. Note its two-wire connector and threaded body for installation into the coolant passage.
How the ECT Sensor Works: Resistance and Voltage
To be useful for the ECU, the ECT sensor’s resistance changes need to be converted into voltage variations. This is achieved by connecting the sensor in a circuit, usually supplied with a stable 5V reference voltage from the ECU.
When the engine is cold, around 20°C (68°F), the sensor’s resistance is high, typically between 2000Ω and 3000Ω. As the engine starts and warms up, the coolant temperature rises, causing the ECT sensor to heat up as well. As it heats, its resistance decreases. At a typical operating temperature of 90°C (194°F), the resistance drops to the range of 200Ω to 300Ω. This change in resistance results in a varying voltage signal being sent to the ECU, accurately reflecting the coolant temperature.
Types of Coolant Temperature Sensors
While most modern vehicles use NTC sensors, it’s good to be aware of different types:
- Negative Temperature Coefficient (NTC): These are the most common type in modern cars. As temperature increases, resistance decreases.
- Positive Temperature Coefficient (PTC): Used in some older systems, like Renix. In PTC sensors, resistance increases with temperature.
For the following testing procedures, we will primarily focus on NTC sensors, as they are the most prevalent.
Step-by-Step Guide: How to Check a Coolant Temperature Sensor
Here are several methods to check the functionality of an NTC coolant temperature sensor:
1. Testing with a Voltmeter (Voltage Measurement)
This method allows you to check the sensor’s voltage signal while it’s connected to the vehicle’s system.
-
Access the Sensor Connector: Locate the ECT sensor, usually found near the thermostat housing or cylinder head. Carefully open the protective rubber cap on the sensor’s connector.
-
Ground the Voltmeter: Connect the negative (black) lead of your voltmeter to a reliable chassis ground point on the vehicle.
-
Identify Signal and Ground Terminals: Determine which terminal on the sensor connector is the signal wire (refer to your vehicle’s wiring diagram if needed). Usually, the other wire is the ground.
-
Connect to the Signal Terminal: Connect the positive (red) lead of the voltmeter to the ECT sensor’s signal terminal.
-
Start the Engine Cold: Start the engine when it’s cold.
-
Observe Initial Voltage Reading: At a cold start, the voltage reading should typically be in the range of 2V to 3V. Refer to Table 1 for typical voltage-temperature relationships.
-
Compare to Temperature: Use a thermometer to measure the ambient temperature or the coolant temperature if easily accessible. Compare the voltmeter reading to the expected voltage range for that temperature using Table 1 as a general guide.
-
Warm Up the Engine and Monitor Voltage: Let the engine warm up to its normal operating temperature. As the engine warms, the voltage reading on the voltmeter should gradually decrease. Observe if the voltage decreases in accordance with the temperature increase and the values in Table 1.
-
Analyze for Common Issues:
- Incorrect Voltage Range: A common issue is a sensor that operates within parameters but with shifted values. For instance, a faulty sensor might read 1.5V cold and 1.25V warm instead of the normal 2V cold and 0.5V warm. This can cause cold starting problems and a rich fuel mixture when warm, without necessarily triggering fault codes if the ECU isn’t programmed to detect subtle voltage deviations.
- 0V Reading: A 0V reading indicates a potential short circuit to ground or a lack of power supply. Check the sensor terminals and wiring for shorts. Also, inspect the signal wires and ECU connections for continuity. If wiring is good, suspect an ECU issue.
- 5V Reading: A constant 5V reading usually signifies an open circuit. This could be a disconnected sensor terminal, an open sensor circuit internally, or an open ground circuit.
| Temperature (°C) | Resistance (Ω) | Voltage (V) |
|---|---|---|
| 0 | 4800 – 6600 | 4.00 – 4.50 |
| 10 | 4000 | 3.75 – 4.00 |
| 20 | 2200 – 2800 | 3.00 – 3.50 |
| 30 | 1300 | 3.25 |
| 40 | 1000 – 1200 | 2.50 – 3.00 |
| 50 | 1000 | 2.50 |
| 60 | 800 | 2.00 – 2.50 |
| 80 | 270 – 380 | 1.00 – 1.30 |
| 110 | 0.50 | |
| Open Circuit | ∞ | 5.0 ± 0.1 |
| Short Circuit to Ground | 0 | 0 |
Table 1: Typical voltage, resistance, and temperature values for an NTC coolant temperature sensor. Note: These values are typical examples and may vary depending on the specific vehicle and sensor manufacturer. Always refer to your vehicle’s service manual for precise specifications.
2. Testing with an Ohmmeter (Resistance Measurement – Sensor Detached)
This method checks the sensor’s resistance directly, but requires detaching it from the vehicle.
-
Detach the Sensor: Carefully disconnect the ECT sensor from the vehicle’s wiring harness.
-
Prepare Water Container: Place the sensor in a container of water.
-
Measure Water Temperature: Use a thermometer to accurately measure the water temperature.
-
Measure Sensor Resistance: Use an ohmmeter to measure the resistance across the sensor’s terminals.
-
Compare Resistance to Table 1: Compare the measured resistance value to the expected range in Table 1 for the measured water temperature.
-
Heat the Water and Re-measure: Gradually heat the water (e.g., using a stove or heat gun – be cautious not to overheat or damage the sensor). As the water heats, periodically measure both the water temperature and the sensor’s resistance.
-
Verify Resistance Change: Confirm that the sensor’s resistance decreases as the water temperature rises and that the values correspond reasonably to Table 1.
3. Testing with an Oscilloscope (Voltage Waveform Analysis)
An oscilloscope provides a visual representation of the voltage signal over time, allowing for a more detailed analysis of the sensor’s response.
-
Connect Oscilloscope: Connect the active probe of the oscilloscope to the sensor’s signal terminal and the ground probe to a chassis ground.
-
Set Oscilloscope to Continuous Mode: Set the oscilloscope to a continuous measurement mode to capture slowly changing signals.
-
Immerse Sensor in Heated Water: Place the detached sensor in a container of heated water.
-
Observe Voltage Waveform: As the water heats and the sensor’s temperature changes, the oscilloscope will display a curve showing the voltage change over time (as seen in Fig. 2). Observe the smoothness and expected downward trend of the voltage curve as temperature increases.
-
Monitor Temperature Simultaneously: Ideally, use a thermometer to continuously monitor the water temperature while observing the oscilloscope waveform. This allows you to correlate voltage changes with temperature changes and further verify sensor accuracy against Table 1.
/ECT.png)
Fig. 2: Typical oscilloscope waveform showing the voltage change of an NTC ECT sensor as temperature increases over time. Note the gradual decrease in voltage as the sensor heats up.
Testing a Positive Temperature Coefficient (PTC) Sensor
If your vehicle uses a PTC sensor (common in some older Renault models), the testing method is similar to that for NTC sensors, but the expected behavior is reversed. For a PTC sensor, resistance and voltage increase with rising temperature. You can compare your measurements with the data in Table 2, which shows typical values for a PTC sensor.
| Temperature (°C) | Resistance (Ω) | Voltage (V) |
|---|---|---|
| 0 | 254 – 266 | |
| 20 | 283 – 297 | 0.6 – 0.8 |
| 80 | 383 – 397 | 1.0 – 1.2 |
| Open Circuit | ∞ | 5.0 ± 0.1 |
| Short Circuit to Ground | 0 | 0 |
Table 2: Typical voltage, resistance, and temperature values for a PTC coolant temperature sensor. Note: Always refer to your vehicle’s service manual for the correct type of sensor and specific values for your vehicle.
By following these methods, you can effectively check your coolant temperature sensor and diagnose potential issues affecting your engine’s performance. Remember to consult your vehicle’s service manual for specific values and procedures relevant to your car model.