Connecting your laptop to your printer using a cable might seem like a step back in time in our wireless world, but it remains a rock-solid, reliable, and often faster method. As an auto repair expert at keyfobprog.com, I understand the importance of dependable connections – whether it’s for diagnostic tools in the garage or peripherals in your home office. Let’s explore why a wired connection is still relevant and how to set it up seamlessly.
Why Choose a Wired Printer Connection?
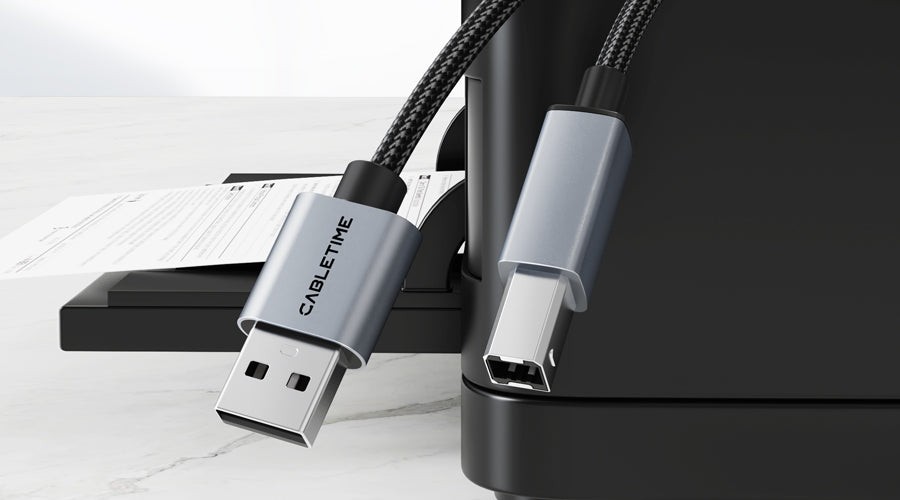
Alt text: A close-up view of a USB-B connector on a printer, highlighting the physical port for wired laptop connection.
While wireless printing offers convenience, it can sometimes be plagued by dropped signals, network congestion, and security concerns. A direct Laptop To Printer Cable connection eliminates these issues, providing several key advantages:
- Unwavering Reliability: Wired connections are inherently more stable than Wi-Fi. You won’t have to worry about signal interference from other devices, dropped connections during large print jobs, or the frustration of your printer suddenly going offline when you need it most. This reliability is crucial, especially when deadlines loom.
- Superior Speed: Data transfer speeds via cables, particularly USB 2.0, USB 3.0, and USB-C, are significantly faster than most wireless connections. This speed advantage becomes especially noticeable when printing large documents, high-resolution images, or graphics-heavy files. A wired connection ensures your print jobs are processed and printed quickly and efficiently.
- Enhanced Security: Wired networks are inherently more secure than wireless networks. By physically connecting your printer to your laptop with a laptop to printer cable, you minimize the risk of unauthorized access to your printer and the sensitive documents you might be printing. This is a significant advantage for privacy and data protection.
- Effortless Compatibility: Wired connections using laptop to printer cables are universally compatible with virtually all laptops and printers. Unlike wireless connections that sometimes require complex network configurations or driver compatibility checks, a cable connection is typically plug-and-play. It simplifies the setup process and reduces potential compatibility headaches.
- Lower Latency: For tasks where immediate response is important, such as printing on demand or interactive printing applications, wired connections offer lower latency. This means less delay between sending the print command and the printer starting to print, resulting in a smoother and more responsive printing experience.
For situations demanding consistent performance, speed, and security, a laptop to printer cable connection remains the optimal choice. Let’s delve into selecting the right cable for your setup.
Selecting the Ideal Laptop to Printer Cable
Navigating the world of cables can be confusing with terms like USB-A, USB-B, and USB-C floating around. Choosing the correct laptop to printer cable is crucial for establishing a successful connection. Think of the cable as the physical bridge allowing data to flow between your laptop and printer.
Here’s a breakdown of common cable types and factors to consider:
| Cable Type | Connectors | Compatibility | Data Transfer Speed | Notes |
|---|---|---|---|---|
| USB-A to USB-B | USB-A (rectangular, standard USB) to USB-B (squarish with a notch) | Most common for printers and older laptops | USB 2.0 (up to 480 Mbps) | Highly prevalent, often included with printers. USB-B end connects to the printer, USB-A to the laptop. |
| USB-C to USB-B | USB-C (small, reversible oval) to USB-B | Newer laptops with USB-C ports and printers with USB-B | USB 2.0 or USB 3.x (up to 10 Gbps depending on USB version) | Ideal for modern laptops lacking USB-A ports. Offers faster speeds if both devices support USB 3.x. |
| USB-C to USB-C | USB-C to USB-C | Newer laptops and some high-end printers with USB-C ports | USB 3.x or Thunderbolt 3/4 (up to 40 Gbps) | Future-proof option for maximum speed and compatibility with cutting-edge devices. Less common for standard printers currently. |
| USB-A to USB-A | USB-A to USB-A | Rarely used for printer connections | USB 2.0 | Primarily for connecting two computers or USB hubs. Not typically for printers. |
Key Considerations When Choosing a Laptop to Printer Cable:
- Port Compatibility is Paramount: The most critical factor is ensuring the connectors on the laptop to printer cable match the ports on both your laptop and printer. Inspect the ports on your devices carefully. Laptops usually have USB-A or USB-C ports. Printers predominantly use USB-B ports, although some newer models may include USB-C. Mismatched ports will prevent a physical connection.
- Data Transfer Speed Needs: While USB 2.0 (common in USB-A to USB-B cables) is sufficient for most printing tasks, if you frequently print large, high-resolution files, a faster USB 3.0 or USB-C cable (like USB-C to USB-B or USB-C to USB-C if supported) can reduce printing time. However, the printer itself must also support the faster USB standard to realize the speed benefit.
- Cable Length: Choose a laptop to printer cable length that comfortably reaches between your laptop and printer without excessive slack. Avoid excessively long cables as they can sometimes lead to signal degradation, especially with older USB standards. A 6-foot cable is usually sufficient for most desktop setups.
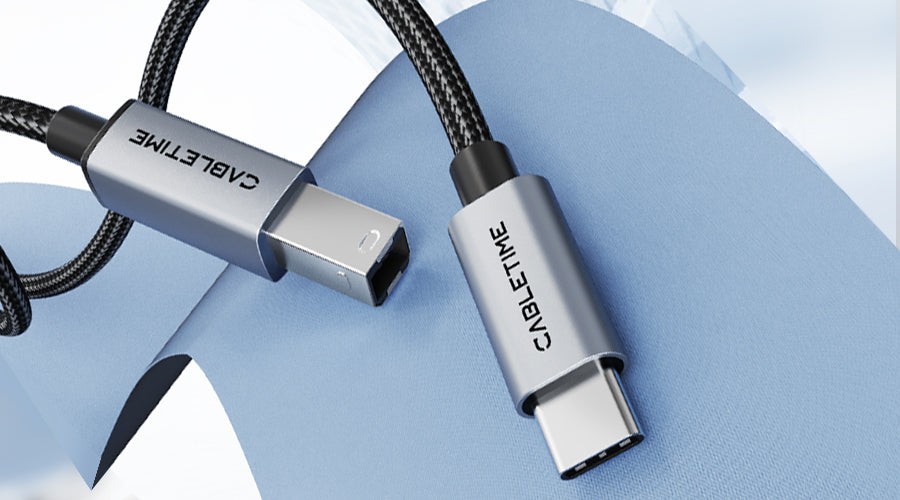
- Cable Quality and Durability: Invest in a well-constructed laptop to printer cable from a reputable brand. Look for features like shielding to minimize signal interference and robust connectors that can withstand repeated plugging and unplugging. A durable cable will ensure a reliable connection and a longer lifespan. Brands like Cabletime offer high-quality cables engineered for performance and longevity.
By carefully considering these factors and identifying the correct port types on your laptop and printer, you can confidently select the perfect laptop to printer cable to establish a robust and efficient wired connection. Now, let’s move on to the connection process itself.
Step-by-Step Guide: Connecting Your Laptop to Your Printer via Cable
With the right laptop to printer cable in hand, establishing a wired connection is a straightforward process. Follow these steps to get your devices communicating:
Step 1: Power Up Your Devices
Begin by ensuring both your laptop and printer are fully powered on. Attempting to connect devices that are turned off or in sleep mode will prevent proper recognition and setup. Verify that both devices are receiving power and are in an active state.
Step 2: Locate the USB Ports
Next, identify the USB ports on both your printer and laptop.
-
Printer Port Location: On most printers, the USB port (typically a USB-B port) is situated at the back of the device. Look for a squarish port with a distinctive notch. Sometimes, it might be labeled with a USB icon or “USB” text. Refer to your printer’s user manual if you are unsure about the port location.
-
Laptop Port Location: Laptop USB ports (usually USB-A or USB-C) are commonly found on the sides or back edges of the laptop chassis. USB-A ports are rectangular, while USB-C ports are small and oval-shaped. Inspect the sides and back of your laptop to locate an available USB port.
Step 3: Establish the Physical Connection with the Laptop to Printer Cable
Now, take your chosen laptop to printer cable and connect your devices:
-
Connect to Laptop: Carefully align the appropriate connector end of the laptop to printer cable (USB-A or USB-C depending on your laptop port) with the corresponding port on your laptop. Gently insert the connector straight into the port until it is firmly seated. Avoid forcing the connector, as this could damage the port.
-
Connect to Printer: Take the other end of the laptop to printer cable (typically USB-B) and align it with the USB port on your printer. Firmly but gently push the connector straight into the printer port until it clicks into place. Ensure a secure connection without bending or forcing the connector.
Once both ends of the laptop to printer cable are securely connected, the physical connection is complete. The next step is to install the necessary printer drivers to enable communication between your laptop and printer.
Driver Installation and Configuration for Wired Printing
Simply plugging in a laptop to printer cable is not enough to enable printing. You need to install printer drivers – software that acts as a translator, allowing your laptop’s operating system to communicate with your specific printer model.
Step 1: Identify Your Printer Model Accurately
Drivers are printer-specific. Therefore, accurately identifying your printer’s brand and model number is the first crucial step. You can typically find this information in several places:
- Printer Label: Look for a label on the printer itself, usually on the front, top, or back panel. It will typically display the manufacturer’s name (e.g., HP, Canon, Epson) and the model number or series name (e.g., LaserJet Pro M404dw, Pixma G6020, EcoTank ET-2720).
- Purchase Receipt or Packaging: Your purchase receipt or the printer’s original packaging box should also list the exact printer model.
- Printer Documentation: The user manual or any documentation that came with your printer will contain the model information.
Step 2: Download the Correct Drivers from the Manufacturer’s Website
Once you have the precise printer model, your next step is to visit the printer manufacturer’s official website. Avoid downloading drivers from third-party websites, as they may contain outdated or even malicious software.
-
Navigate to Support/Downloads: On the manufacturer’s website (e.g., hp.com, canon.com, epson.com), look for sections labeled “Support,” “Downloads,” “Drivers,” or similar.
-
Search by Printer Model: Enter your printer model number into the website’s search bar or navigate through product categories to find your specific printer model page.
-
Select Operating System: The website will typically ask you to select your computer’s operating system (e.g., Windows 10 64-bit, macOS Monterey). Choose the operating system that matches your laptop.
-
Download Drivers: Look for driver downloads specifically for wired (USB) connections. Download the recommended driver package, which usually includes the printer driver and potentially utility software.
Step 3: Install the Printer Drivers
After downloading the driver file, proceed with the installation:
-
Run the Installer: Locate the downloaded driver file (usually an executable file with a .exe extension for Windows or a .dmg file for macOS) and double-click it to launch the installer.
-
Follow On-Screen Instructions: The driver installer will guide you through the installation process. Accept any license agreements, and follow the prompts.
-
Choose Connection Type: During installation, you may be asked to choose a connection type. Select “USB” or “Wired Connection” to indicate you are using a laptop to printer cable.
-
Complete Installation: Click “Install” or “Finish” to complete the driver installation. You may be prompted to restart your computer after installation is complete.
Step 4: Configure Printer Settings in Your Operating System
After driver installation, your operating system should automatically detect the connected printer. You may need to configure some settings:
For Windows:
- Go to Start Menu > Settings > Devices > Printers & scanners.
- Click “Add a printer or scanner.” Windows should automatically detect your connected printer.
- Select your printer from the list and click “Add device.”
- Follow any remaining on-screen prompts to finalize the setup.
For macOS:
- Go to Apple Menu > System Preferences > Printers & Scanners.
- Click the “+” button at the bottom left to add a printer.
- Select your printer from the list. macOS should automatically detect your connected printer.
- Click “Add.”
- You can configure default print settings like paper size and quality in this Printers & Scanners panel.
Once these steps are completed, your laptop should be fully configured to print to your connected printer using the laptop to printer cable. It’s always a good idea to perform a test print to confirm everything is working correctly.
Troubleshooting Common Wired Printer Connection Issues
Alt text: A frustrated user gesturing at a printer with an error message, illustrating common printer connection problems.
Even with a wired laptop to printer cable connection, occasional issues can arise. Here’s a troubleshooting guide for common problems:
Issue #1: Printer Not Detected by Laptop
Symptoms: Laptop does not recognize the printer even after connecting the cable and installing drivers. Printer does not appear in the “Printers & scanners” list (Windows) or “Printers & Scanners” system preference (macOS).
Possible Causes and Solutions:
- Loose Cable Connection: The most common culprit. Ensure the laptop to printer cable is securely plugged into both the laptop and printer ports. Unplug and replug both ends to ensure a firm connection.
- Faulty Cable: The laptop to printer cable itself might be damaged. Try using a different USB cable if you have one available.
- Incorrect Port: Double-check that you’ve connected the cable to the correct USB ports on both devices. Refer to your printer and laptop manuals for port identification.
- Outdated or Corrupt Drivers: Drivers can become outdated or corrupted. Re-download the latest drivers from the manufacturer’s website and reinstall them. Uninstall the old drivers first before reinstalling.
- Printer Power Issue: Ensure the printer is powered on and not in a sleep or error state. Try turning the printer off and then on again.
- Laptop Port Issue: The USB port on your laptop might be malfunctioning. Try connecting the laptop to printer cable to a different USB port on your laptop.
- Device Restart: A simple restart of both your laptop and printer can often resolve temporary software glitches that might be preventing detection.
Issue #2: Printing Errors or Failed Print Jobs
Symptoms: Printer is detected, but print jobs fail to print completely, print incorrectly, or produce error messages.
Possible Causes and Solutions:
- Paper Jams: Check for and clear any paper jams inside the printer.
- Ink/Toner Levels: Ensure ink or toner cartridges are not empty or low. Replace cartridges if necessary.
- Incorrect Paper Settings: Verify that the paper type and size settings in your print dialog box match the paper loaded in the printer.
- Print Spooler Issues (Windows): The print spooler service manages print jobs. Restarting it can resolve errors. Search for “Services” in the Windows Start Menu, find “Print Spooler,” right-click, and select “Restart.”
- Software Conflicts: Close other applications running on your laptop that might be conflicting with the printer driver or print process.
- Printer Firmware Update: Check the printer manufacturer’s website for firmware updates for your printer model. Updating firmware can sometimes resolve software-related printing issues.
- Printer Memory Issues: For complex print jobs, insufficient printer memory can cause errors. Try printing a simpler document to see if the issue persists. Some printers allow you to add more memory.
Issue #3: Slow Printing Speed
Symptoms: Printing is significantly slower than expected, especially with large documents or graphics.
Possible Causes and Solutions:
- Slow Cable: While less likely with wired connections, an older or damaged laptop to printer cable could theoretically limit speed. Ensure you are using a USB 2.0 or faster cable.
- High Print Quality Settings: Higher print quality settings (e.g., higher resolution, photo paper) naturally take longer to print. Reduce print quality settings if speed is a priority.
- Laptop Performance: If your laptop is running slowly overall or is low on resources, it can affect printing speed. Close unnecessary applications and ensure your laptop meets the printer’s recommended system requirements.
- Outdated Drivers: Ensure you have the latest printer drivers installed. Driver updates often include performance improvements.
- Printer Processing Speed: Older or lower-end printers inherently have slower processing speeds. If consistently slow printing is a major issue, consider upgrading to a faster printer model.
By systematically troubleshooting these common issues, you can usually resolve most wired printer connection problems and restore smooth, reliable printing.
Print Testing and Optimization for Optimal Results
After successfully connecting your laptop to your printer with a laptop to printer cable and installing drivers, it’s essential to perform test prints to verify the connection and optimize print quality.
Step 1: Initiate a Test Print
Most operating systems and printer drivers offer a built-in test print function:
- Windows: Go to Start Menu > Settings > Devices > Printers & scanners. Select your printer, click “Manage,” and then click “Print a test page.”
- macOS: Go to Apple Menu > System Preferences > Printers & Scanners. Select your printer, click “Options & Supplies,” then click “Print Test Page” in the “Utility” tab.
Alternatively, you can print a simple document or image from any application to test the connection.
Step 2: Evaluate the Test Print Output
Carefully examine the test print for the following:
- Print Quality: Check for sharpness, clarity, and any blurring or smudging of text and images.
- Color Accuracy (for color printers): Verify that colors are printed accurately and vibrantly.
- Missing or Faded Areas: Look for any missing text, faded lines, or blank areas on the page.
- Streaks or Lines: Check for unwanted horizontal or vertical lines or streaks in the printout.
- Paper Handling: Ensure the paper is fed correctly without skewing or jamming.
Step 3: Adjust Printer Settings for Desired Quality
If the test print reveals any quality issues, adjust your printer settings:
- Print Quality/Resolution: Increase the print quality or resolution setting in your printer driver for sharper prints (e.g., “Best,” “High Quality”). Be aware that higher quality settings may increase printing time and ink/toner consumption.
- Paper Type Setting: Ensure the paper type setting in your print driver matches the type of paper you are using (e.g., “Plain Paper,” “Glossy Photo Paper,” “Heavyweight Paper”). Incorrect paper type settings can affect print quality and ink absorption.
- Color Settings (for color printers): Experiment with different color profiles or color management settings in your printer driver to optimize color accuracy and vibrancy.
Step 4: Printer Maintenance for Optimal Print Quality
Subpar print quality can sometimes be due to printer maintenance issues:
- Clean Print Heads: Most printers have a built-in print head cleaning utility. Run this utility from your printer’s control panel or through the printer driver software. Clogged print heads are a common cause of print quality problems.
- Check Ink/Toner Cartridges: Ensure ink or toner cartridges are not low or expired. Replace cartridges if necessary.
- Paper Path Cleaning: Dust and debris in the paper path can affect print quality. Follow your printer’s manual to clean the paper path and rollers.
By performing test prints and optimizing printer settings and maintenance, you can ensure your wired laptop to printer cable connection delivers consistently excellent print results.
Maintaining Your Wired Printer Connection for Longevity
A wired laptop to printer cable connection is inherently robust, but basic maintenance can further extend its lifespan and ensure continued reliable performance.
1. Regular Cleaning:
- Dust Removal: Dust accumulation is a common enemy of electronics. Periodically use compressed air to remove dust from printer ports, cable connectors, and the printer’s exterior. Dust buildup can lead to poor connections and overheating.
- Gentle Cleaning of Connectors: If connectors appear dirty, gently clean them with a soft, dry cloth or a cotton swab. Avoid using excessive moisture or harsh chemicals.
2. Cable and Connection Inspection:
- Visual Inspection: Regularly inspect the laptop to printer cable for any signs of physical damage, such as fraying, cuts, or bent connectors. Damaged cables can cause intermittent connections or signal degradation.
- Secure Connections: Ensure that the laptop to printer cable is firmly plugged into both the laptop and printer ports. Loose connections are a common source of problems.
3. Software and Firmware Updates:
- Driver Updates: Keep your printer drivers updated to the latest versions available from the manufacturer’s website. Driver updates often include performance improvements, bug fixes, and compatibility enhancements.
- Firmware Updates: Check for printer firmware updates on the manufacturer’s website. Firmware updates can improve printer performance, add new features, and address security vulnerabilities.
4. Proper Cable Management:
- Avoid Stress on Cables: Avoid bending or kinking the laptop to printer cable sharply. Excessive bending can damage the internal wires.
- Cable Ties or Management: Use cable ties or cable management solutions to keep the laptop to printer cable organized and prevent it from being accidentally pulled or tripped over.
5. Quality Consumables:
- Use Recommended Ink/Toner and Paper: Use ink or toner cartridges and paper types recommended by the printer manufacturer. Using low-quality or incompatible consumables can negatively impact print quality and potentially damage the printer over time.
By incorporating these simple maintenance practices, you can ensure your wired laptop to printer cable connection remains reliable and your printer continues to perform optimally for years to come.
Conclusion: The Enduring Reliability of Wired Printer Connections
Connecting your laptop to your printer with a laptop to printer cable remains a dependable and efficient method in today’s technology landscape. While wireless options offer convenience, wired connections provide unmatched reliability, speed, and security for critical printing tasks.
This comprehensive guide has walked you through every step, from selecting the right cable and establishing the physical connection to installing drivers, troubleshooting common issues, and maintaining your wired setup for long-term performance.
By embracing the simplicity and robustness of a laptop to printer cable connection, you can eliminate wireless frustrations and enjoy consistent, high-quality printing whenever you need it.
People Also Ask: Wired Laptop to Printer Cable Connections
What are the potential risks of using generic or low-quality printer cables for my laptop to printer cable connection?
Using generic or low-quality laptop to printer cables can introduce several risks. These cables may have poor shielding, leading to electromagnetic interference (EMI) and data corruption. They might also use substandard materials, resulting in reduced data transfer speeds, intermittent connections, and a higher chance of cable failure. Low-quality connectors can also damage your device ports. Investing in a quality laptop to printer cable ensures reliable performance and protects your equipment.
How does electromagnetic interference (EMI) affect laptop to printer cable performance, and how can I minimize it in my wired setup?
Electromagnetic interference (EMI) can disrupt the signals traveling through a laptop to printer cable, leading to data errors, slower print speeds, and connection instability. EMI sources can include power cords, fluorescent lights, and other electronic devices. To minimize EMI:
- Use Shielded Cables: Opt for laptop to printer cables that are shielded to block EMI.
- Cable Routing: Keep the laptop to printer cable away from power cords and other potential EMI sources.
- Cable Length: Use the shortest laptop to printer cable length necessary, as longer cables are more susceptible to EMI.
- Cable Management: Organize cables to prevent them from running parallel to power cords for extended distances.
In what situations is a wired laptop to printer cable connection preferable over a wireless printer connection?
A wired laptop to printer cable connection is preferable in scenarios where:
- Reliability is paramount: For critical print jobs where you cannot afford connection drops or interruptions.
- Speed is important: When printing large documents or high-resolution graphics and you need fast data transfer.
- Security is a concern: To minimize the risk of unauthorized access to your printer and printed documents.
- Simplicity is desired: For straightforward, plug-and-play setup without network configuration complexities.
- Troubleshooting wireless issues: When wireless printing is unreliable or experiencing problems, a wired connection provides a stable alternative.
Are there specific length limitations for laptop to printer cables that I should be aware of to maintain optimal signal quality?
Yes, there are practical length limitations for laptop to printer cables, particularly for USB cables. While the USB 2.0 specification allows for a maximum cable length of 5 meters (approximately 16 feet) without signal boosting, and USB 3.0/3.x/3.2 is generally recommended to be shorter (around 3 meters or 10 feet) for optimal performance. Exceeding these lengths can lead to signal degradation, data loss, and unreliable connections. For longer distances, consider using USB extender cables with signal repeaters or explore network-based printing solutions like Ethernet or Wi-Fi. For typical desktop setups, a 6-foot cable is usually sufficient and minimizes signal quality concerns.
Can using a USB hub or extender cable impact the performance of my laptop to printer cable connection?
Yes, using a USB hub or extender cable can potentially impact the performance of your laptop to printer cable connection. USB hubs, especially unpowered ones, can reduce the power available to the printer and introduce signal degradation, particularly if multiple devices are connected to the hub. Extender cables, especially passive ones, can also weaken the USB signal over longer distances.
To minimize negative impacts:
- Use Powered USB Hubs: If you must use a hub, choose a powered USB hub that provides adequate power to all connected devices, including the printer.
- High-Quality Hubs and Extenders: Opt for reputable brands and high-quality USB hubs and extender cables that are designed to minimize signal loss.
- Limit Hubs and Extenders: Minimize the number of hubs and extenders in the connection chain. Avoid daisy-chaining multiple hubs.
- Keep Cable Lengths Short: Even with hubs and extenders, keep the total cable length as short as possible.
If you experience performance issues like slow printing or intermittent connections when using a hub or extender, try connecting the laptop to printer cable directly to your laptop without the hub or extender to see if the issue resolves.