Is your Old Toyota Key Fob looking worse for wear? Like many Toyota owners, you might find that the rubber casing on your key fob starts to crack and crumble over time, exposing the electronics inside. The author of the original article from robpegoraro.com experienced this firsthand with their 2005 Toyota Prius key fob. While the fob still functioned, its deteriorating condition was a constant annoyance. The good news is, you don’t have to spend a fortune on a brand new key fob from the dealership. There’s a much more economical and satisfying solution: replacing just the outer shell.
Instead of shelling out upwards of $250 for a complete Toyota key fob replacement, you can refresh your existing key by simply swapping out the damaged shell. This DIY fix is surprisingly straightforward and can save you a significant amount of money. The original author opted for an aftermarket replacement shell from Amazon for under $14 and successfully transferred the internal components, giving their “zombie key fob” a new lease on life. This article will guide you through the process, drawing inspiration from their experience and expanding on the steps to ensure you can confidently undertake this repair yourself.
Replacing the shell is a smart move for several reasons:
- Cost-Effective: As highlighted, aftermarket shells are significantly cheaper than complete replacements.
- Environmentally Friendly: You’re reusing the working electronics of your original fob, reducing electronic waste.
- DIY Satisfaction: There’s a genuine sense of accomplishment in fixing something yourself, and this is a relatively simple and rewarding project.
Now, let’s get into the step-by-step process of replacing your old Toyota key fob shell.
Step-by-Step Guide to Toyota Key Fob Shell Replacement
Before you begin, gather the necessary tools and your replacement shell. For this project, you’ll likely need:
- A new replacement shell compatible with your Toyota key fob model. Search online marketplaces like Amazon using terms like “Toyota key fob shell replacement” and your car model (e.g., “Toyota Prius key fob shell”).
- A small Phillips head screwdriver (often included with the replacement shell).
- A razor blade or thin, sturdy knife (be cautious!).
- A small prying tool or flathead screwdriver (optional, for gentle prying).
- A new CR2032 battery (optional, but a good idea to replace while you’re at it).
Once you have everything ready, follow these steps:
-
Prepare the Old Key Fob: Begin by removing the physical key from your old Toyota key fob. There’s usually a small release button or slider that allows you to detach the metal key. Next, locate and remove the battery compartment cover, typically on the back of the fob, using a small Phillips head screwdriver. Remove the old battery.
-
Opening the Old Key Fob Shell: This is often the trickiest part, as the original shells are usually glued or tightly snapped together. As the original author discovered, “persuasion” is often needed. Carefully insert a razor blade or thin knife into the seam of the key fob shell. A good starting point is often near the physical key slot. Gently but firmly work the blade along the seam, applying slight pressure to separate the two halves. Be patient and avoid forcing it too much, as you don’t want to damage the internal electronics. You might hear a popping sound as the glue gives way.
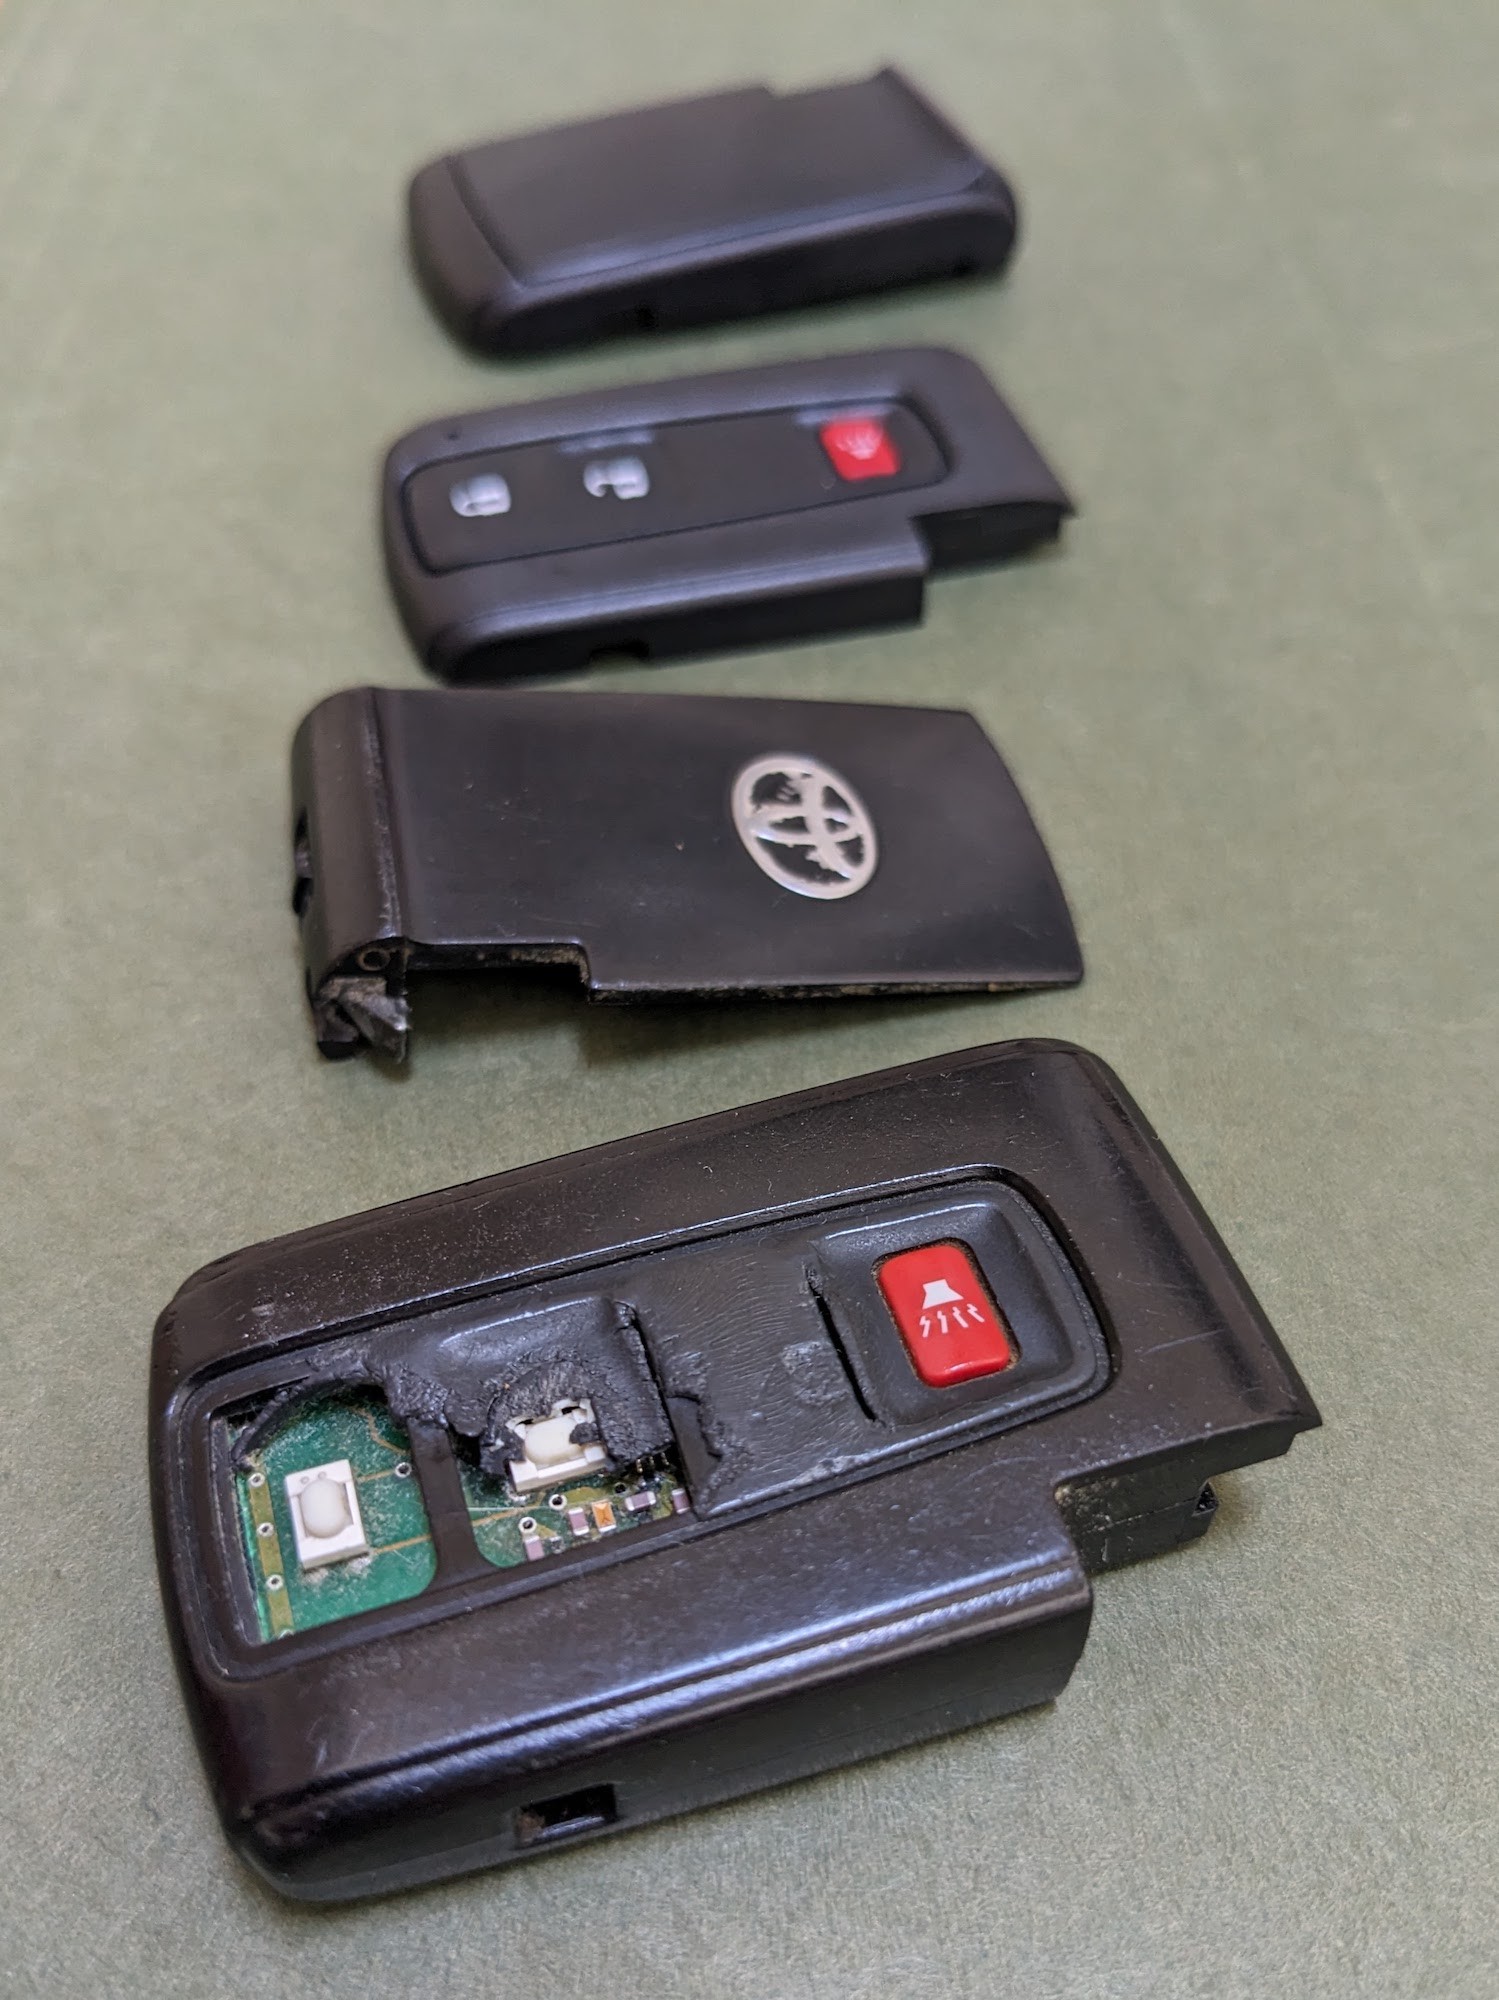 Comparison of an old, worn Toyota key fob next to a new aftermarket replacement shell, highlighting the improvement achievable through DIY repair.
 -
Transferring the Internals: Once the old shell is open, you’ll see the green circuit board and possibly a separate black RFID module. Carefully remove the circuit board from the old shell. It might be held in place by small clips or just pressure. Note the orientation of the circuit board. If there’s a separate RFID module, gently pry it out as well.
-
Assembling the New Shell: Take your new replacement shell and place the circuit board and RFID module (if applicable) into the corresponding positions within the new shell halves. Ensure they fit snugly and are properly aligned. If you are replacing the battery, now is a good time to insert a new CR2032 battery, remembering to replace the gasket if there is one. Carefully snap the two halves of the new shell together. They should click securely into place. Replace the battery compartment cover and tighten the screw.
-
Final Touches: Slide the physical key into the new shell’s slot. You can often transfer the Toyota logo from the old fob to the new one for a more original look, as the author did.
Congratulations! You’ve successfully replaced your old Toyota key fob shell and given it a fresh, new appearance. This simple DIY project not only saves you money but also extends the life of your existing key fob. For more automotive DIY tips and key fob programming solutions, explore the rest of keyfobprog.com.